Cloudflare Workers & SvelteKit: BetterAuth, Custom Domain, Google OAuth, OTP & Email - Securing Your Application.
What makes an application “production ready”?
In my previous article “Cloudflare Workers, SvelteKit, Drizzle, and D1: Up and Running.”, we set up a SvelteKit guestbook application from scratch and deployed it to Cloudflare Workers.
Now we’re taking it to the next level. In this article we’re going step by step to:
- Set up a real domain
- Add BetterAuth to our application
- Implement social login using Google OAuth
- Implement one-time-password login using email (Mailgun)
- Add email bombing- and bot protection using Cloudflare Turnstile
- Bringing it all together but setting up Drizzle relations in the guestbook to have authenticated users post.
By the end of this, you will be equipped with the knowledge to write a complete SvelteKit application in Cloudflare Workers.
Prerequisites
For this article it will be very helpful if you’re familiar with SvelteKit, Drizzle and D1. You won’t need to know more than I explained in my previous article, so feel free to read that first and come back here:
Now without further ado, go time.
A custom domain
You’re on a custom domain right now, jilles.me. It’s the best way to reach a website. It’s an absolute must for any production application. Not only is it a way for people to find and use your application, it is required to implement social login such as Google OAuth and required for sending emails. More on that later.
If you already have a custom domain, you can go on to the BetterAuth section. If you have a domain outside of Cloudflare, you’ll need to set-up Cloudflare for your domain. In this article, I will be buying a domain on Cloudflare’s registrar because it’s the simplest to integrate Cloudflare Workers.
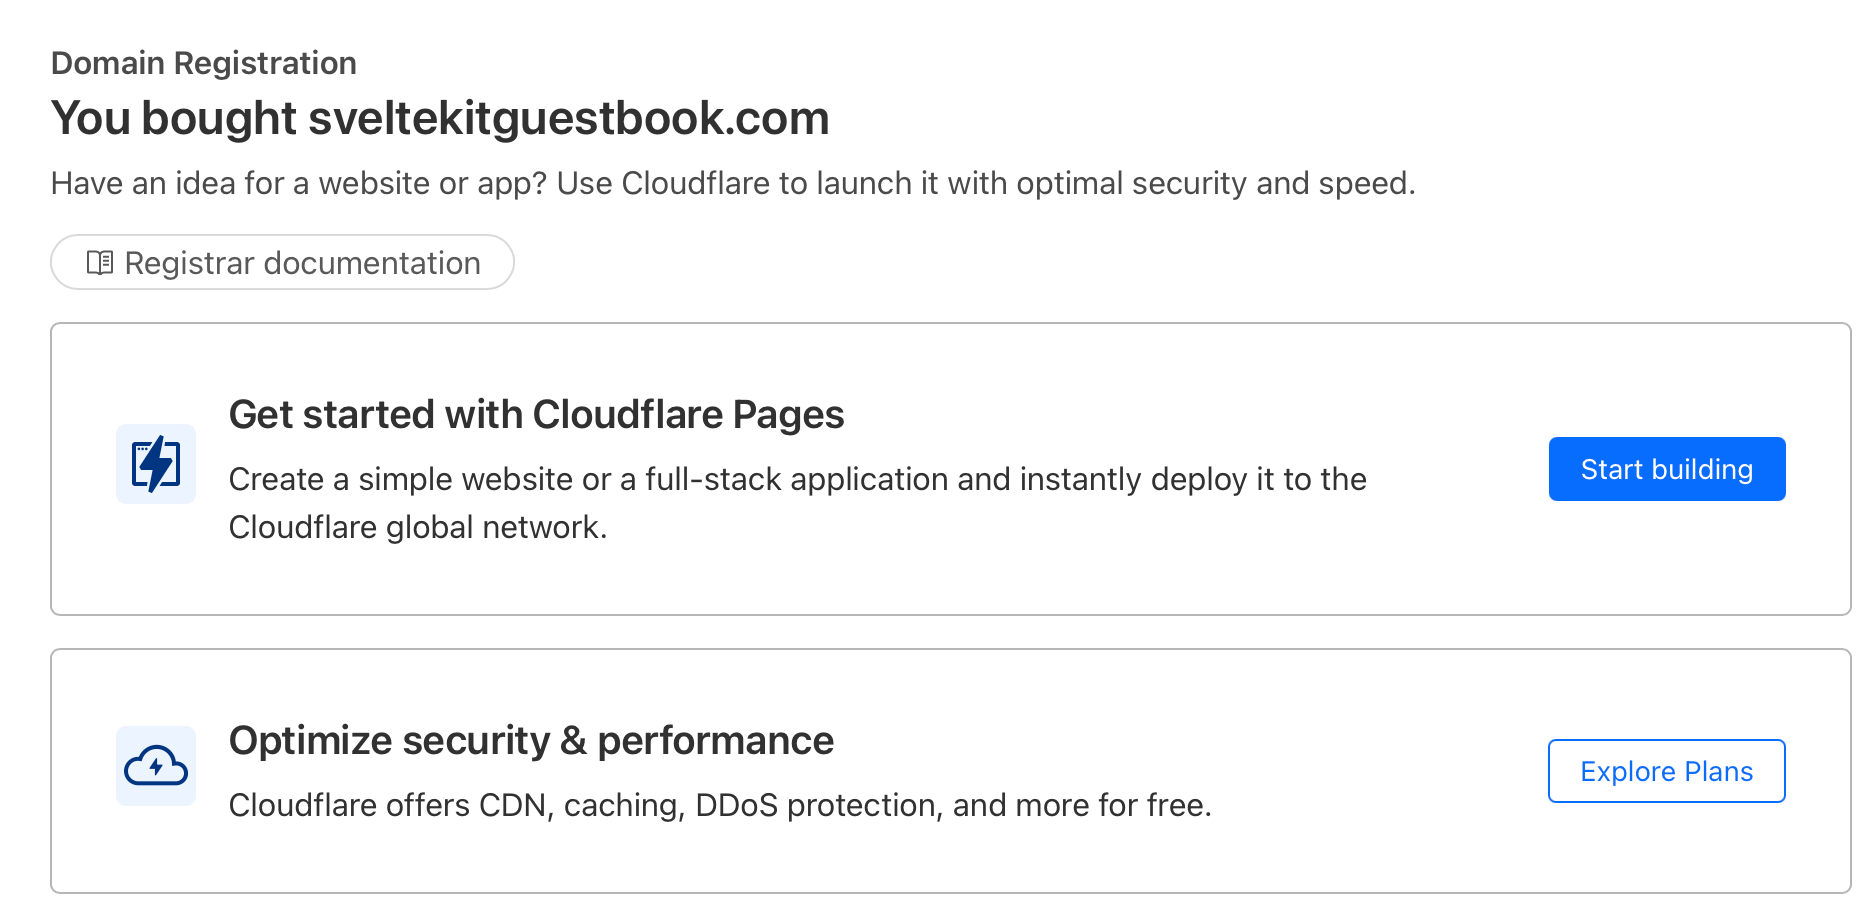
Since we have been building a guestbook in SvelteKit, I thought of a very original domain:

In your Cloudflare account, under Domain Registration there is an option Register Domains. Here is where you’ll find a domain that perfectly matches your application and with one click, you rent a small piece of web real-estate.
Once you’ve bought the domain of your dreams, it’s time to link your Cloudflare Worker to it. In our previous article we ended up with a working guestbook under sveltekit-guestbook.bold-sea-1f51.workers.dev. Hardly a memorable URL. (Note that I have not made it a clickable link as the domain does no longer exist).
To point your domain to your Cloudflare Worker, open up the worker page, go to the worker setting page and add your newly registered domain name:

Now we’ll make a small change to our wrangler.jsonc file to add our domain and deploy the application!
Add the following route configuration to your wrangler.jsonc
... "route": { "pattern": "sveltekitguestbook.com", "custom_domain": true },$ pnpm run deploy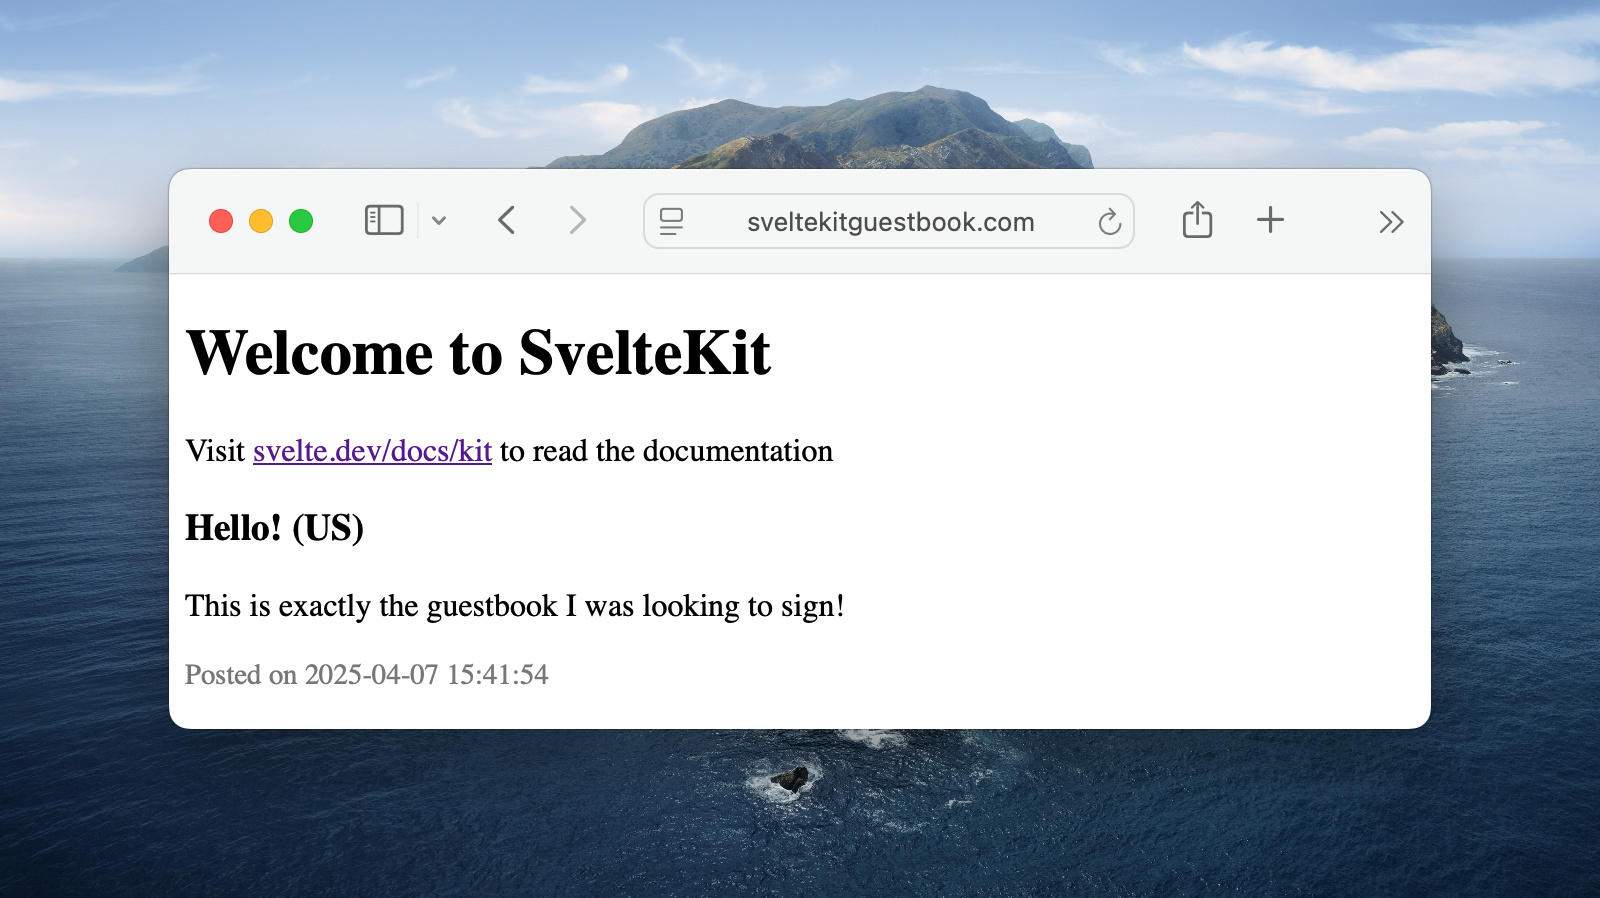
And we’re live!
That’s it! We now have a working domain. This is a benefit of Cloudflare Workers: No SSL ceritifcates to manage, it just works.
Adding BetterAuth
For the last 10 years, I have mostly been using Django as my framework of choice. Among many other things, it has build in user models and strong authentication. That was something the JavaScript/TypeScript ecosystem was missing. There are many paid solutions out there, but coming from Django I found it silly to pay for authentication. I’m guessing Ruby on Rails developers feel the same.
BetterAuth brings that level of authentication and authorization to TypeScript. It has support for React, Vue, Solid, Svelte and plain old vanilla JavaScript.
Their extensive plugin ecosystem allows us to do 3 major parts of this article:
- Google Oauth
- One Time Password (OTP)
- Captcha (Turnstile)
It’s as simple as
$ pnpm add better-authBetterAuth requires you to set a secret key. You can generate one in multiple ways, but an easy one is to click the “Generate Key” button on their documentation website under “Set Environment Variables”
Once you have your secret key, you can add it to your .env and .dev.vars files
BETTER_AUTH_SECRET=EtVy2cSabwgc9f2psPjwMzczVGeS2129BETTER_AUTH_URL=http://localhost:8787 # add this only in .dev.varsNext we’ll create an auth.ts file.
import { betterAuth } from "better-auth";import { drizzleAdapter } from "better-auth/adapters/drizzle";import { env } from '$env/dynamic/private';import { createLibSqlClient } from './lib/server/db';import * as schema from './lib/server/db/schema';
const db = env.DATABASE_URL ? createLibSqlClient(env.DATABASE_URL) : null;
if (!db) throw new Error("DATABASE_URL is not set");
export const auth = betterAuth({    database: drizzleAdapter(db, {        schema,        provider: "sqlite"    })})
We are explicitly using ./lib here and not SvelteKit’s $lib so that the BetterAuth CLI will find the files correctly. Now we’ll generate the schema:
$ pnpm dlx @better-auth/cli generate✔ Do you want to generate the schema to ./auth-schema.ts? … yes2025-04-08T13:35:13.203Z SUCCESS [Better Auth]: 🚀 Schema was generated successfully!This will create an auth-schema.ts file containing the models required for BetterAuth. Copy the contents of auth-schema.ts into our schema.ts and delete the “old” auth-schema.ts. Alternatively you could keep auth-schema.ts and import/re-export the tables in schema.ts. I prefer the former.
Once the new tables are inside our existing schema.ts file, we can run our migrations: db:make-migrations and db:migrate (created in the previous article)
$ pnpm db:make-migrations...5 tablesaccount 13 columns 0 indexes 1 fksguestbook_messages 5 columns 0 indexes 0 fkssession 8 columns 1 indexes 1 fksuser 7 columns 1 indexes 0 fksverification 6 columns 0 indexes 0 fks
[✓] Your SQL migration file ➜ src/lib/server/db/migrations/0001_abandoned_random.sql 🚀
$ pnpm db:migrate...[✓] migrations applied successfully!%
This will have created all the required user/session/token tables. Now that we’ve used the CLI and generated the migrations, we can change auth.ts to be usable in Cloudflare Workers. Instead of exporting an auth instance, we export a factory function. We’ll also export the correct type.
import { betterAuth } from "better-auth";import { drizzleAdapter } from "better-auth/adapters/drizzle";import * as schema from '$lib/server/db/schema';import type { DrizzleClient } from "$lib/server/db";
export const createAuth = function (database: DrizzleClient) {  return betterAuth({    database: drizzleAdapter(database, {      schema,      provider: "sqlite",    }),  });};
export type BetterAuth = ReturnType<typeof createAuth>
Once we have our factory function, we can attach it to our locals in SvelteKit. First let’s use that type we just created in app.d.ts
/// <reference types="./worker-configuration" />import type { DrizzleClient } from "$lib/server/db";import type { BetterAuth } from "./auth"; // <- new// See https://kit.svelte.dev/docs/types#app// for information about these interfaces
declare global {  namespace App {        interface Platform {            env: Env            cf: CfProperties            ctx: ExecutionContext        }        interface Locals {            db: DrizzleClient            auth: BetterAuth // <- new        }    }}
export {};
We’ve imported our BetterAuth type and assigned it to auth. Finally we need to enable the it in our hooks.server.ts.
import type { Handle } from '@sveltejs/kit';import { env } from '$env/dynamic/private';import { createD1Client, createLibSqlClient } from '$lib/server/db';import { createAuth } from './auth';import { svelteKitHandler } from 'better-auth/svelte-kit';
const db = env.DATABASE_URL ? createLibSqlClient(env.DATABASE_URL) : null;
export const handle: Handle = async ({ event, resolve }) => { if (event.platform?.env.DB) { event.locals.db = createD1Client(event.platform.env.DB); } else if (db) { event.locals.db = db; } else { throw new Error('No database found'); } // New: const auth = createAuth(event.locals.db); event.locals.auth = auth;
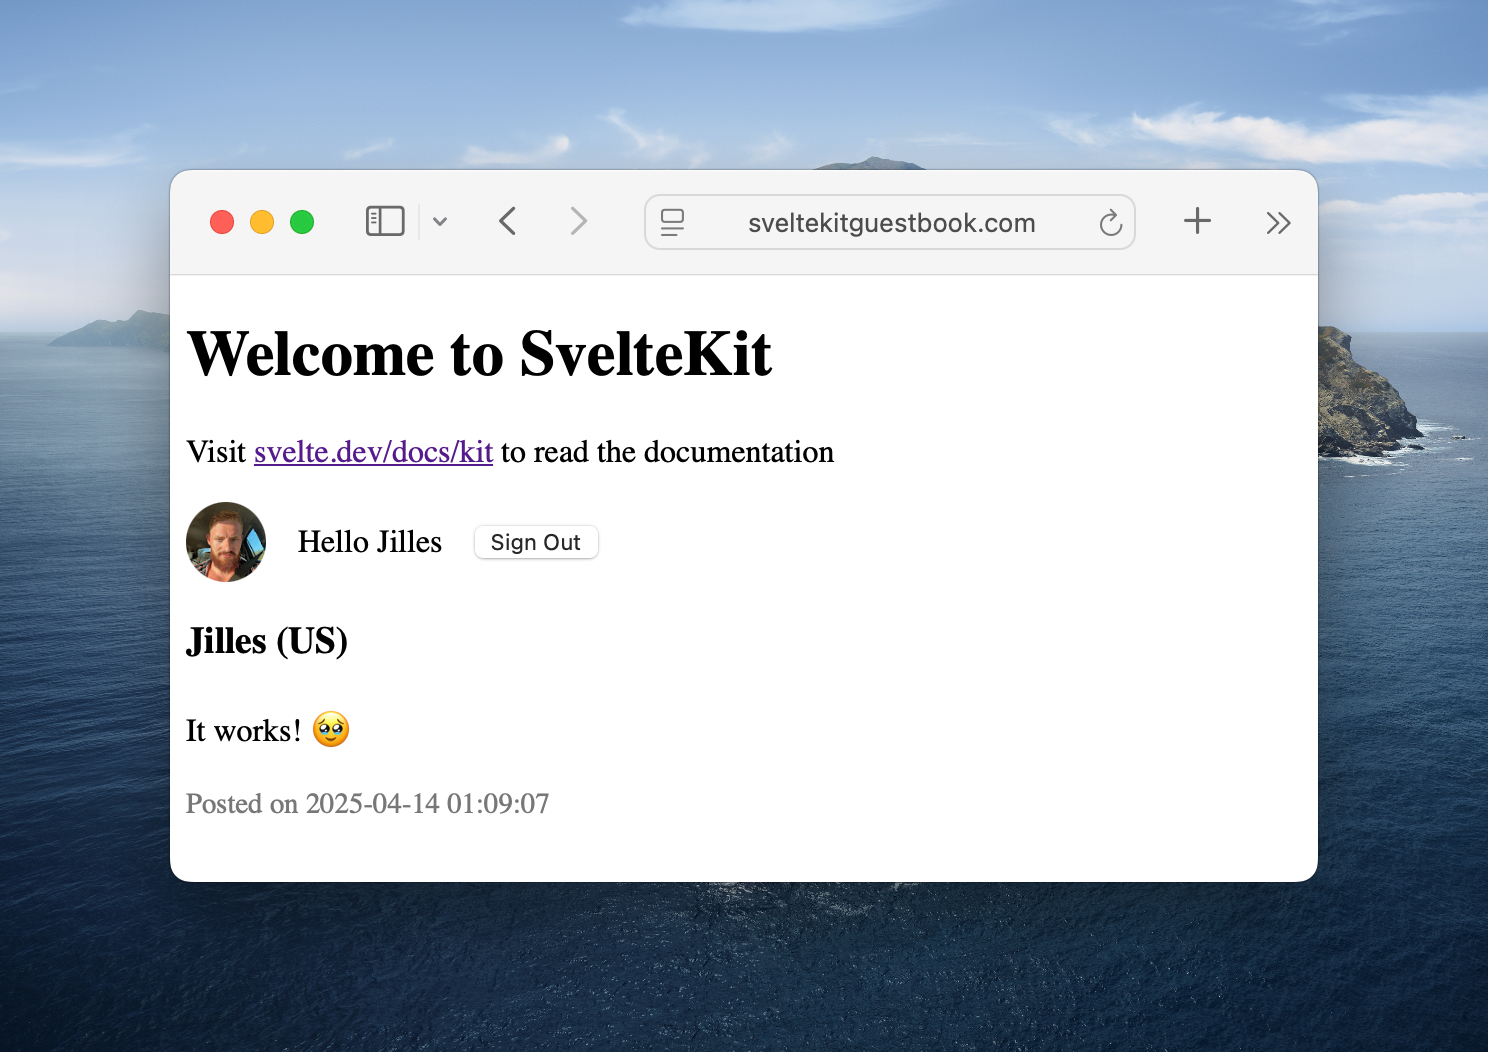
return svelteKitHandler({ event, resolve, auth })};Now in our locals, we have an auth instance. In our homepage, we can get the user’s session to see if they are logged in or not. We’ll make a very small update to our +page.server.ts
export const load: PageServerLoad = async ({ request, locals }) => { const session = await locals.auth.api.getSession({ headers: request.headers }); // new const messages = await locals.db.select().from(guestbookMessages).limit(10).orderBy(desc(guestbookMessages.createdAt)); return { session, messages, };};Then in our view we can use that session:
{#if data.session?.user}<img src={data.session.user.image} alt={data.session.user.name} />Hello {data.session.user.name}<button>Logout</button>{:else}<a href="/login">Login</a>{/if}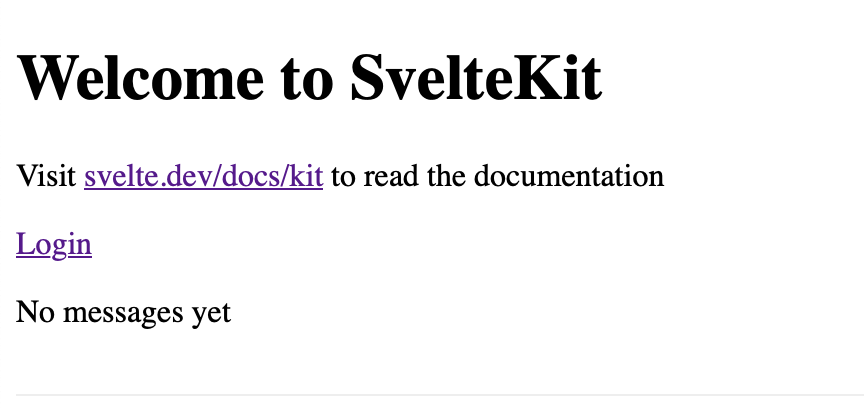
This might not seem like much, but we have laid the foundation. Next we’re going to add Google OAuth.
Google OAuth
You’ve probably seen this on most websites, a big “Log in with Google” button. It’s for a good reason. This authentication method is incredibly simple to implement. You don’t need to hash / store passwords (great for serverless environments!). You don’t need elaborate bot protection, as Google has its own state-of-the-art bot protection. Therefore, it’s safe to say that if someone authenticates with Google, it is likely that they are a real person.
It’s also free! You do need a Google account and have a project available in the Google Cloud Console. We’ll start by creating the OAuth credentials.
Log-in to the Google API Console and create a new project in the top left corner.

After creation, head over to Credentials on the lefthand menu. Under click Create Credentials and choose OAuth 2.0 Client IDs. If you haven’t already, it will ask you to create a Consent Screen first.
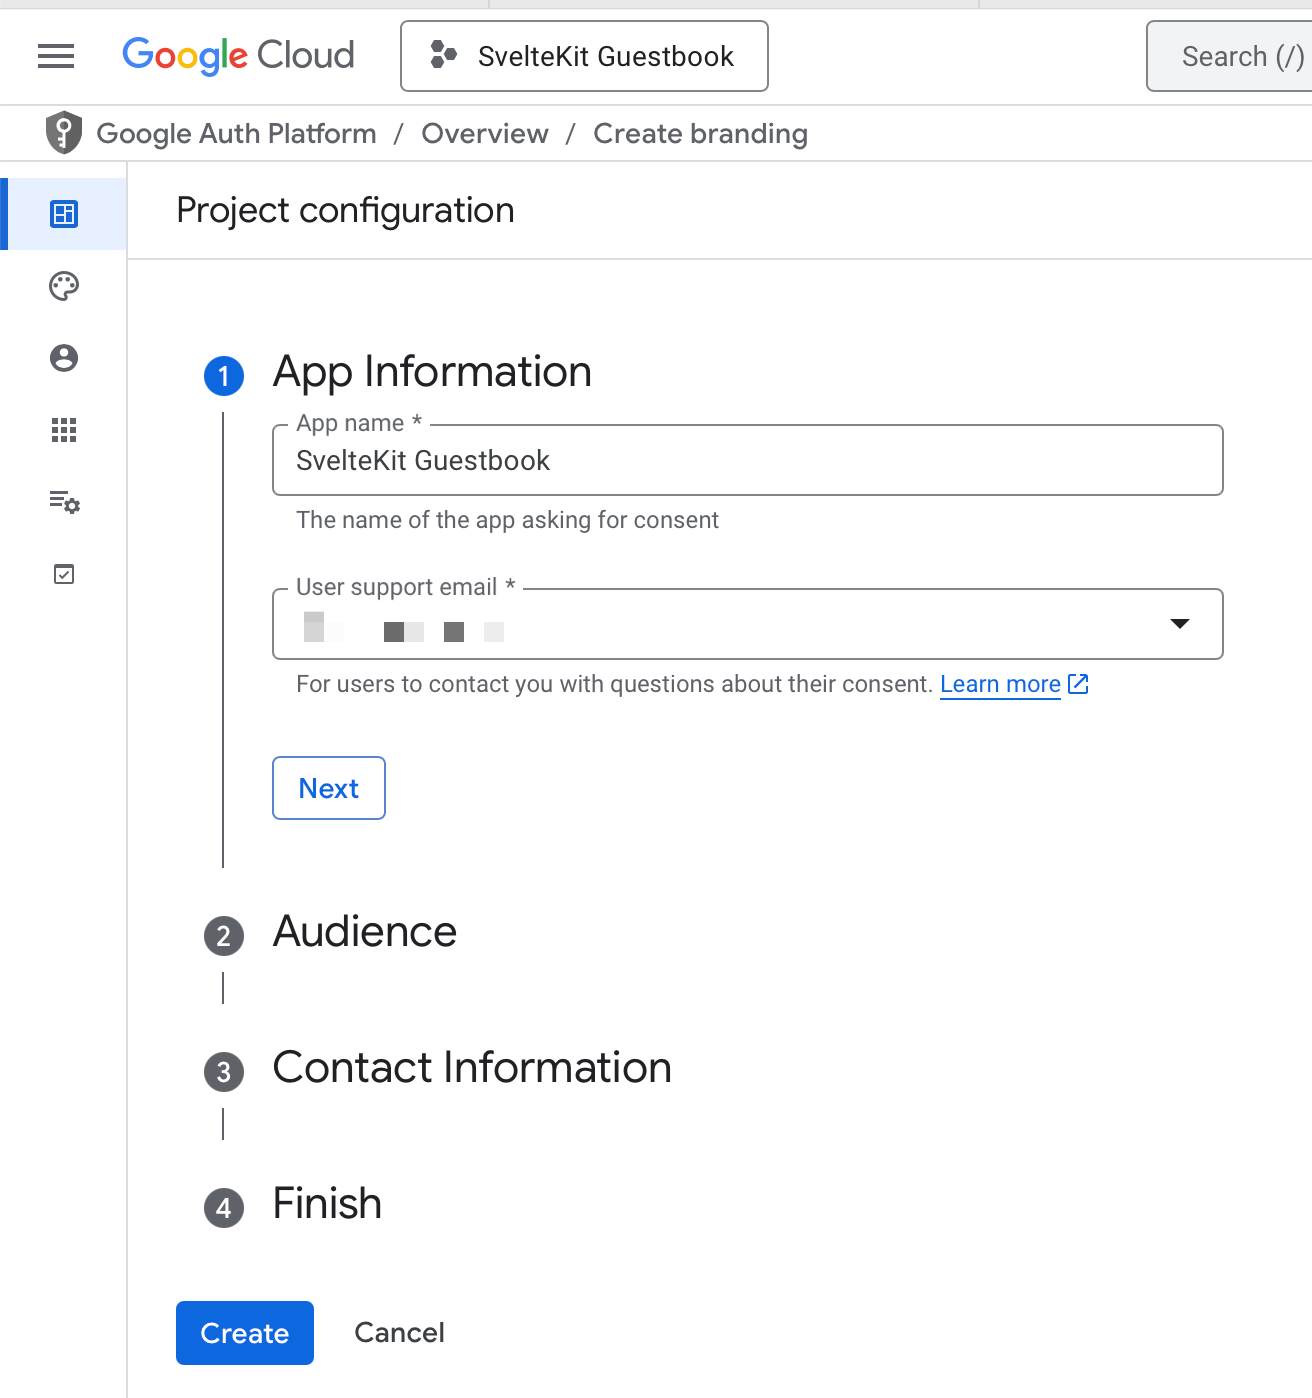
- App Information: add your application name and your public application email address (e.g. legal@sveltekitguestbook.com).
- Audience, choose External.
- Contact Information, add your personal contact information for Google to contact you
- Finish: Agree to the therms and conditions.
As soon as you have configured the constent screen, you’ll see a button with “Create client”. If you don’t see that button, the “credentials” item on the left is now “clients”, click that and there should be a “Create client” button. Click it.
There will be another series of questions:
- Application type: Web Application
- Name: Name of your OAuth client in the Google dashboard
- Authorized origins: see image below
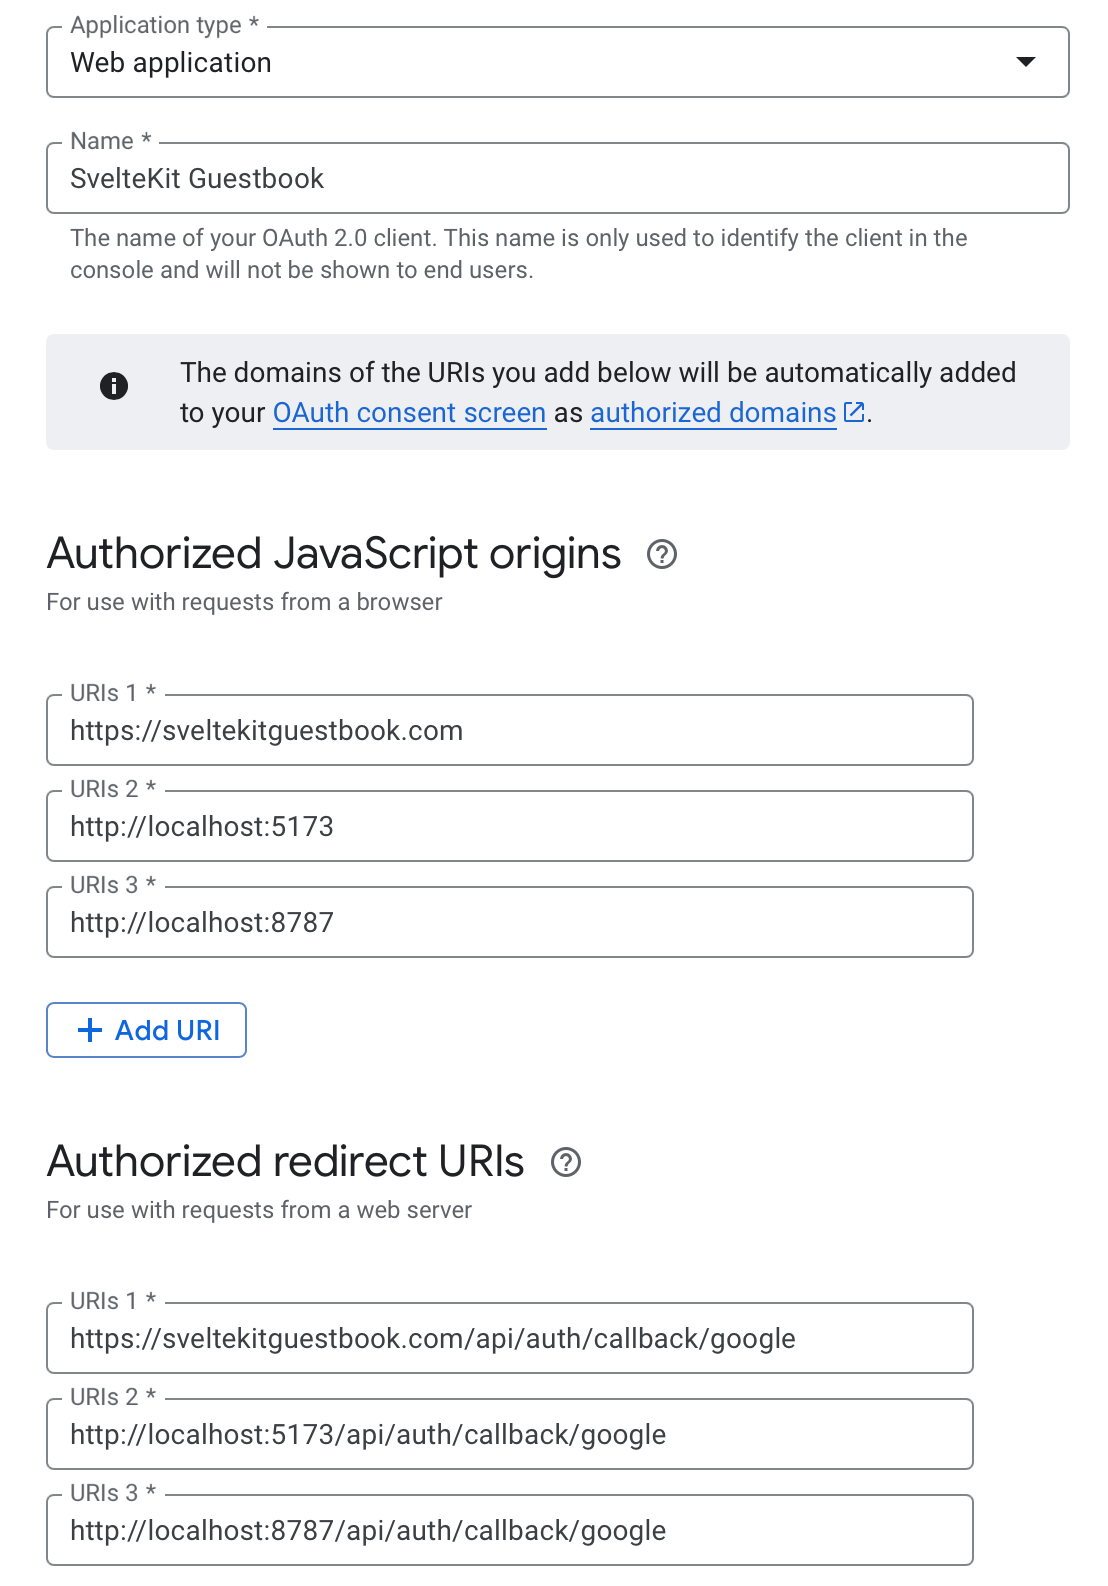
We’ve added 3 authorized JavaScript origins and 3 authorized redirect URIs. The JavaScript origins are what pages are allowed to trigger to OAuth flow. I have my production URL, our pnpm dev url and our pnpm preview url. These are the places I can open the authentication flow from. If you were to steal my credentials and trigger the modal from “maliciouswebsite.com”, Google would simply throw a “origin not allowed” error.
Redirect URIs is where Google will redirect the user to after a successful or erroneous request. Note that these URLs are set up by BetterAuth and handled by the SvelteKit auth hook we added.
Finally we click “Create” and you’ll see a success modal!
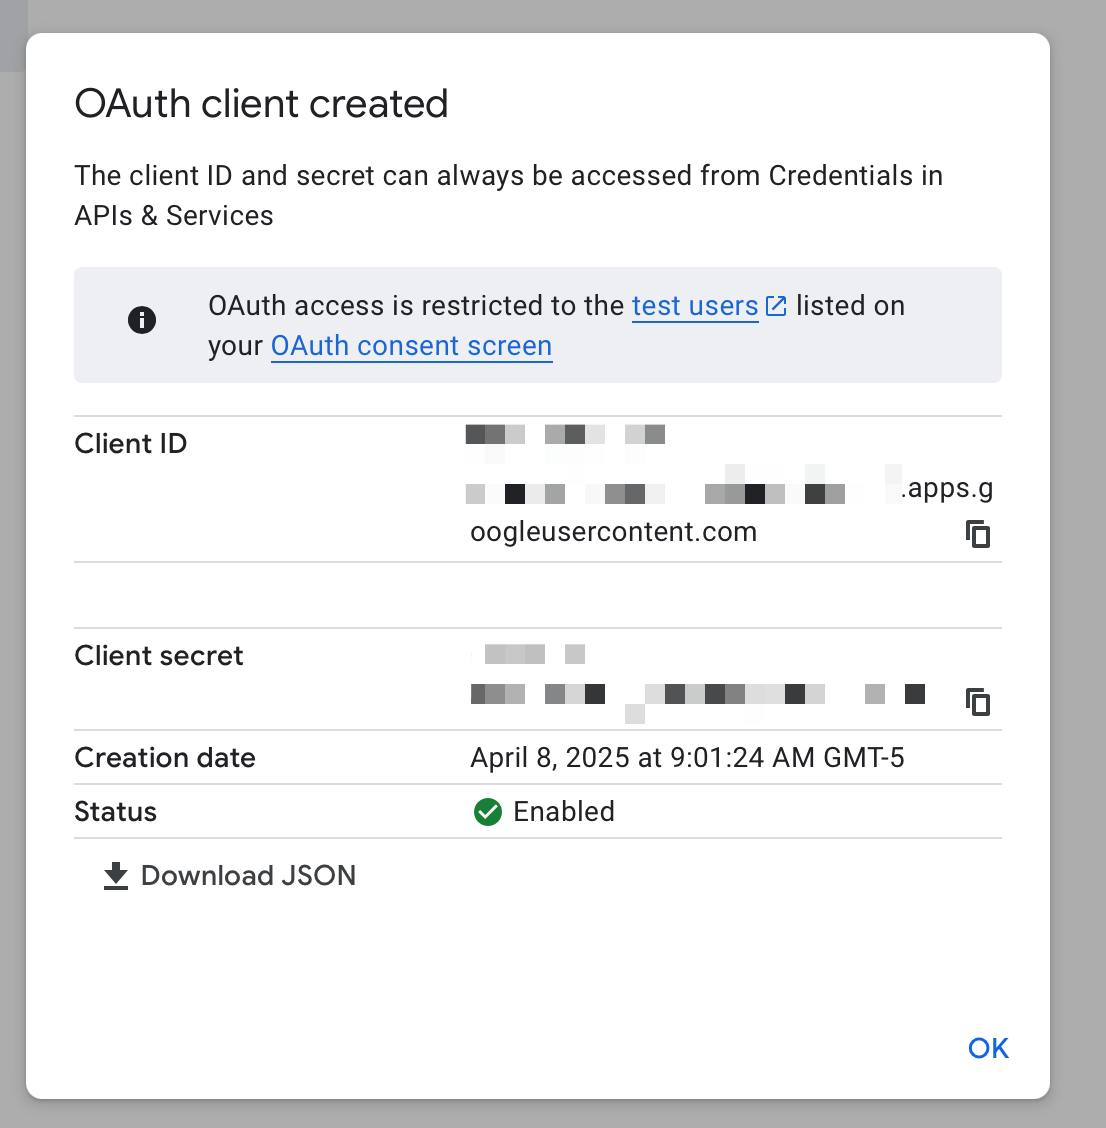
Note that that “Oauth access is restricted to test users” is not a problem. As long as you do not set a logo and do not request sensitive scopes (which we don’t), you don’t need to verify your application and can publish it to production without any problems. If you do end up setting a logo, you have to record a small YouTube video of your application to get verified. This is a security measure.
Alright the tedious part is done, it’s time to copy your Google OAuth Client ID and Client secret into your .env and .dev.vars.
BETTER_AUTH_SECRET=BETTER_AUTH_URL=http://localhost:8787 # only in .dev.varsGOOGLE_CLIENT_ID=GOOGLE_CLIENT_SECRET=With our secrets in place, it’s time to return to BetterAuth and implement our login. You’ll be amazed by how easy it is. First, we need to add the credentials to our BetterAuth auth instance.
...import { env } from "$env/dynamic/private";
export const createAuth = function (database: DrizzleClient) {  return betterAuth({    database: drizzleAdapter(database, {      schema,      provider: "sqlite",    }),    socialProviders: {      google: {        clientId: env.GOOGLE_CLIENT_ID as string,        clientSecret: env.GOOGLE_CLIENT_SECRET as string,      },    },  });};
Next we need to call the right endpoint from our client. Let’s create a /login page and an authClient. We’re nearly there! The auth client is very simple, create a new src/lib/auth-client.ts
import { createAuthClient } from "better-auth/svelte"
export const authClient = createAuthClient()
That’s it. Now the log-in route. Create a src/routes/login/+page.svelte.
<script lang="ts">    import { authClient } from '$lib/auth-client';
    async function loginWithGoogle() {        await authClient.signIn.social({            provider: "google",            callbackURL: "/",            errorCallbackURL: "/",            newUserCallbackURL: "/",        });    }</script>
<h1>    Login</h1>
<button onclick={loginWithGoogle}>    Login with Google</button>
Now that we have our auth-client, let’s also implement logging out logic in our homepage:
import { authClient } from "$lib/auth-client";import { invalidateAll } from "$app/navigation";...{#if data.session?.user}...<button onclick={async () => { await authClient.signOut(); invalidateAll() } }> Sign Out</button>Believe it or not, that’s it!
Sheesh! That’s why OAuth is such a popular way of signing in. It’s incredibly easy to set up with modern libraries. Would this work in pnpm preview too? No.
You would be able to authenticate, but logging out wouldn’t work because of the following error:
✘ [ERROR] 2025-04-15T12:47:57.920Z ERROR [Better Auth]: Invalid origin: http://sveltekitguestbook.comhttp? It turns out that when using wrangler dev, the environment proxies requests and uses the first route as host. Our route (the one we added it in the custom domain part) has sveltekitguestbook.com. Our dev server runs on http, so BetterAuth (rightfully so) says “No! your host header is not https://sveltekitguestbook.com”. We have 2 options:
- Add
"dev": { "host": "localhost" }to wrangler.jsonc andhttp://localhostto BetterAuth trusted origins - Add
http://sveltekitguestbook.comto our trusted origins. This could be an environment variable too (recommended)
In your .dev.vars you can add:
TRUSTED_ORIGINS=http://localhost:8787,http://sveltekitguestbook.comAnd then update auth.ts:
...export const createAuth = function (database: DrizzleClient) { return betterAuth({ trustedOrigins: env.TRUSTED_ORIGINS?.split(',') ?? [], ...That way you can host your application on multiple domains if you wanted to. It cost me a little while to figure out the wrangler dev host issue, so hopefully it saves you the same pain!
Finally it is time to push this to our Cloudflare Worker. We’ll run a few commands:
- Run the
cf-typegentool so that our types have the latest environment variables - Apply the migrations (for BetterAuth)
- Set the environment variables (secrets) for Google OAuth and BetterAuth
$ pnpm run cf-typegen$ wrangler d1 migrations apply guestbook-db --remote$ wrangler secret put BETTER_AUTH_SECRET$ wrangler secret put GOOGLE_CLIENT_ID$ wrangler secret put GOOGLE_CLIENT_SECRETAnd of course:
$ pnpm run deployVoila!
On Email and Password in Cloudflare Workers (free tier)
Before we continue, I want to briefly touch on using email and password as an authentication method in Cloudflare Workers (free tier). For another SvelteKit project (https://portfolioslice.com), I have email/password authentication. This is because it runs on my own VPS and I have ample CPU. Hashing passwords is CPU intensive by design. If it takes ~100ms to hash a password, that makes it much harder to crack it using brute-force than if it takes ~5ms to hash a password.
If you are on the paid tier, you get up to 30 seconds of CPU per request, so could easily implement BetterAuth’s built-in email/password. It uses scrypt under the hood which - from my testing in Cloudflare Workers - takes about 80ms to hash a password. That would immediately get killed in the free-tier. Therefore I chose to not include it in my Cloudflare Worker articles.
Instead, we’ll be using another method that requires almost no CPU: emailing a one time password (OTP)
Implementing an One Time Password (OTP) using BetterAuth and Mailgun
As you have seen, it’s incredibly easy to set up Google OAuth using BetterAuth. Using their plugin system, it’s also really straightforward to set up other plugins. We’ll add 2 more in this article, first: One Time Password.
A quick note, the little brother of OTP is “magic link”, in which you send a user a link that they can click and they’re automatically logged-in. In my opinion, this is a horrible user experience. Sometimes people use different browsers. Or mobile devices open a “stock browser” by default. All in all, I wouldn’t recommend it. Instead, OTP is great. People can just copy (or even remember) their 6 digit code, and log-in without issue.
Emails aren’t totally free, but they are very cheap. I chose Mailgun because that’s what I have been using and they have an amazing Flex plan, where you get 1000 emails per month free, and pay $1 for each additional thousand. In my 5 years of using them, I’ve paid $2 once due to a malicious person spamming one of my Django websites. This was before I implemented bot/spam protection (which we’ll get to later, too!).
We’ll start by setting it up using just a console.log to check if it works. Then later instead of logging the code, we’ll email it in a production environment
Adding OTP to BetterAuth
Open up our beloved auth.ts and import the emailOTP plugin:
import { emailOTP } from "better-auth/plugins";...export const createAuth = function (database: DrizzleClient) { return betterAuth({ ... socialProviders: {...}, plugins: [ emailOTP({ async sendVerificationOTP({ email, otp, type }) { if (type === "sign-in") { console.log(`Sending OTP for sign-in to ${email}: ${otp}`); } }, }) ]Next we also need to add it to our auth-client.ts
import { createAuthClient } from "better-auth/svelte"import { emailOTPClient } from "better-auth/client/plugins"
export const authClient = createAuthClient({    plugins: [emailOTPClient()]})
And finally we need to create a view for the 2 BetterAuth calls:
- Sending the OTP
- Verifying the OTP
We’ll add 2 input fields: one for email, one for the code. Using Svelte’s templates to show one or the other. Open up our login route:
<script lang="ts">    import { authClient } from '$lib/auth-client';    import { goto } from '$app/navigation';
    let formView: "email" | "otp" = $state("email");    let email = $state("");    let otp = $state("");    let errorMessage = $state("");
    async function sendOtp(event: SubmitEvent) {        event.preventDefault();        const { data, error } = await authClient.emailOtp.sendVerificationOtp({            email: email,            type: "sign-in",        });
        if (data?.success) {            formView = "otp";        } else {            errorMessage = error?.message || 'An unknown error occurred';        }    }
    async function verifyOtp(event: SubmitEvent) {        event.preventDefault();        const { data, error } = await authClient.signIn.emailOtp({            email: email,            otp: otp,        });        if (data?.user) {            goto("/", { invalidateAll: true });        } else {            errorMessage = error?.message || 'An unknown error occurred';        }    }
    async function loginWithGoogle() { ... }</script>
...
<hr /><p>Or log in with a one-time password. We'll email you a code.</p>
{#if formView === "email"}<form onsubmit={sendOtp}>    <label for="email">Email</label>    <input type="email" bind:value={email} name="email" />    <button type="submit">        Send me a login code    </button></form>{:else if formView === "otp"}<form onsubmit={verifyOtp}>    <label for="otp">Enter the code we sent you</label>    <input type="text" pattern="\d{6}" bind:value={otp} name="otp" />    <button type="submit">Login</button>    <button type="button" onclick={() => formView = "email"}>Cancel</button></form>{/if}
{#if errorMessage}    <p class="error">{errorMessage}</p>{/if}
lets walk through the code:
- We store some form state using Svelte 5 runes
- We have 2 functions
- Send OTP, on success show verify form
- Verify OTP, on success redirect to home
- Any error is shown under the form
We are using form’s onsubmit so we get browser validation for emails and a 6 digit code.
Amazing! As you can see, it even “remembered” my image. That’s because I logged in using social authentication first. Thank you BetterAuth!
Showing a code in the console is one thing, emailing it to an actual email address is another.
Sending real emails using Mailgun
In the following steps we will be setting up Mailgun and send emails. If you prefer using anther email delivery provider such as Resend or Postmark, most of the steps will still apply. I am not affiliated with Mailgun but as I mentioned before, I’ve enjoyed using their product for free for many years.
Once you’ve set up a Mailgun account, you can add your domain name. Usually you use something like “mx.[domain].com”. Where mx is short for Mail Exchange. That’s what we’ll go with:
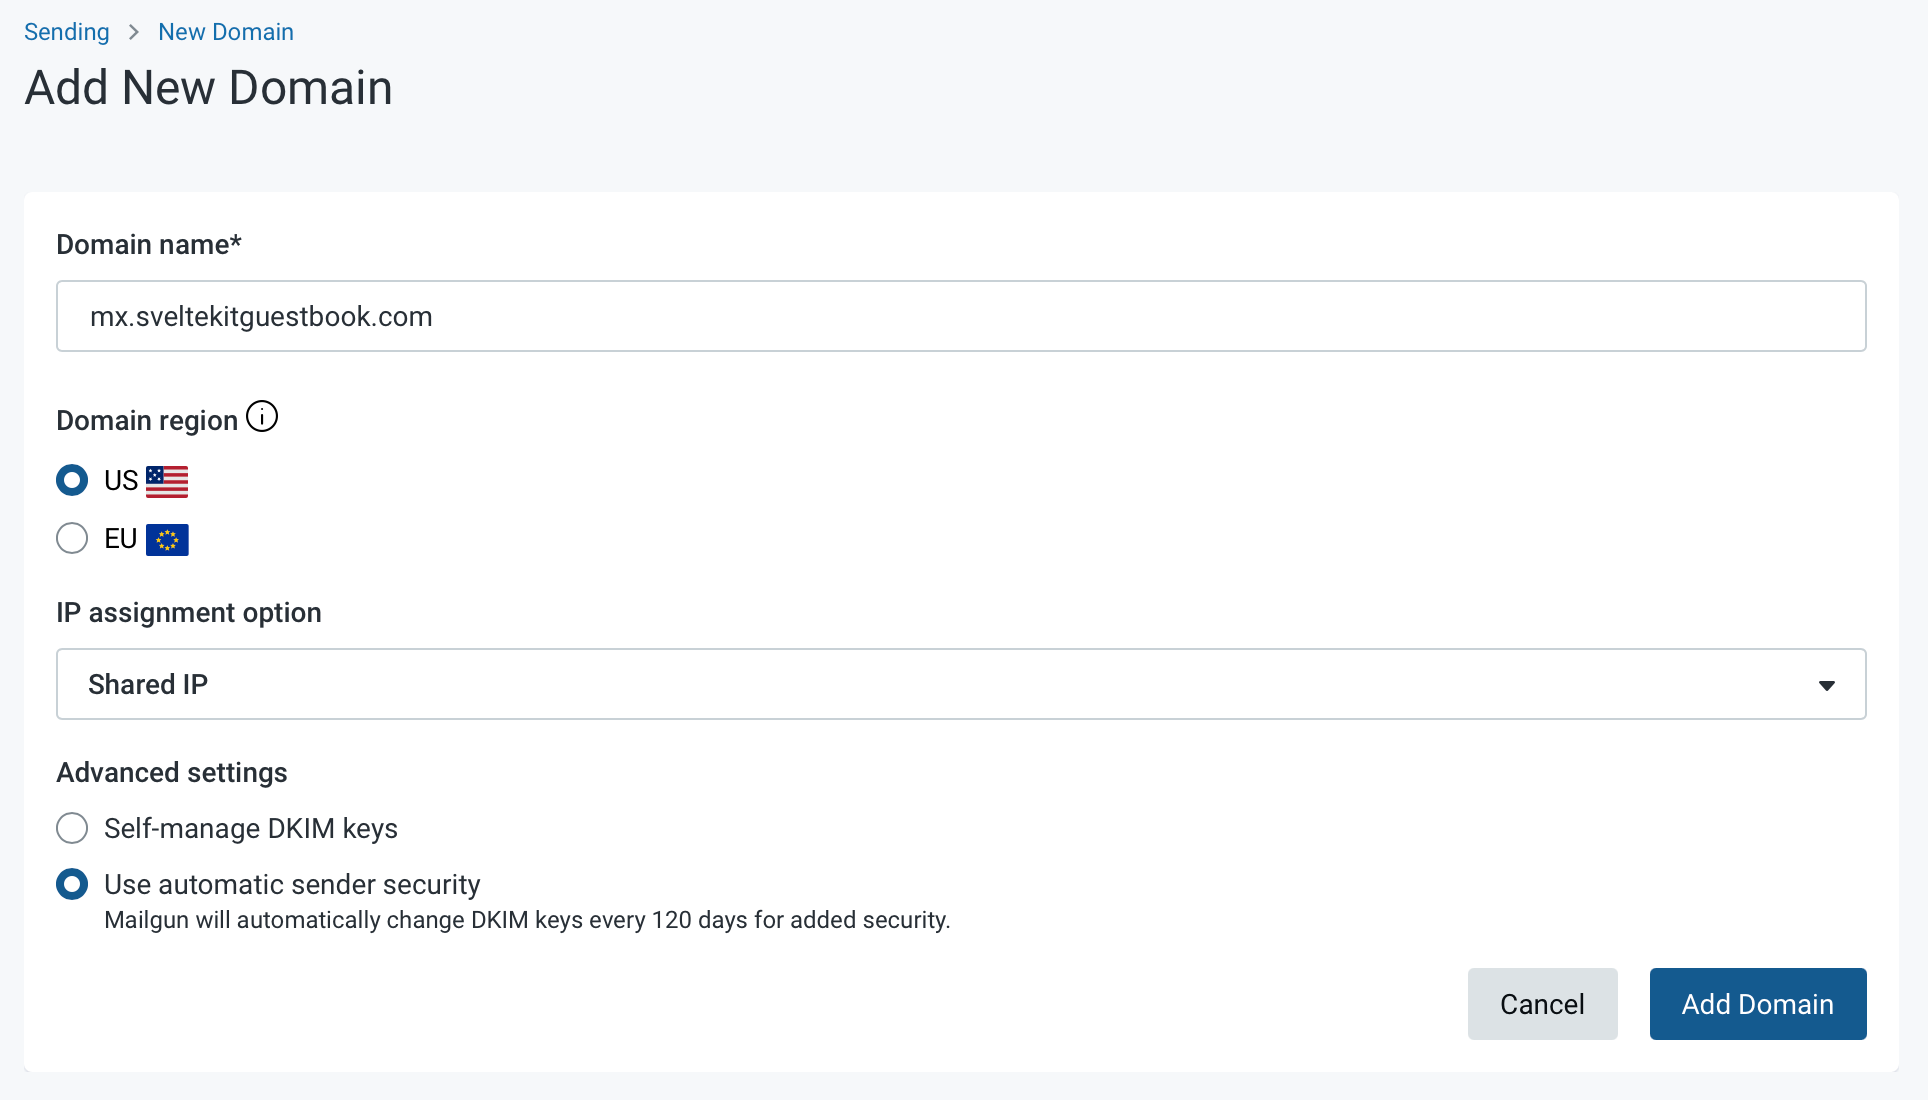
Self-managing DKIM keys gets you running faster, but I like the additional security provided out of the box by Mailgun. It took about ~10 minutes to set up. Most of which was spend waiting.
Once you add a domain, Mailgun will show you all the DNS records you need to add. Copy each one of them into Cloudflare. Make sure to not proxy the request through Cloudflare (orange cloud) and instead use DNS only (grey cloud).
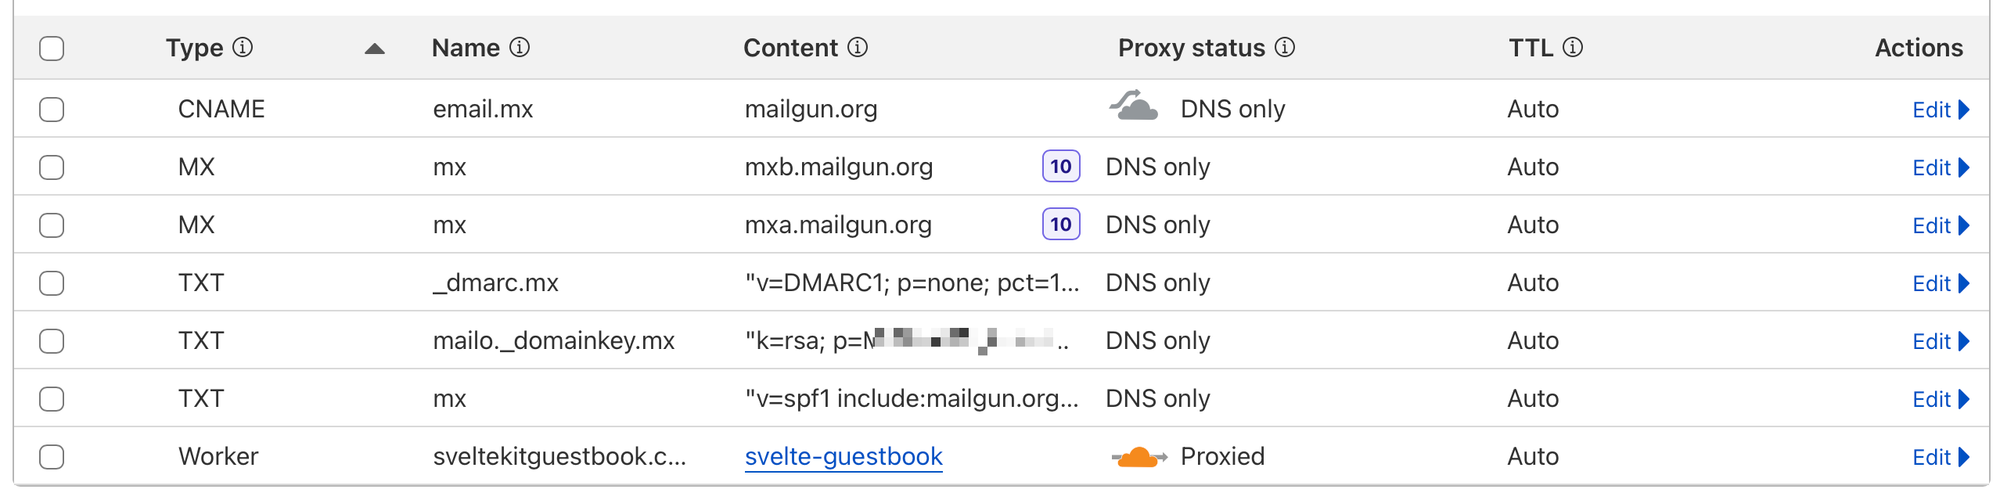
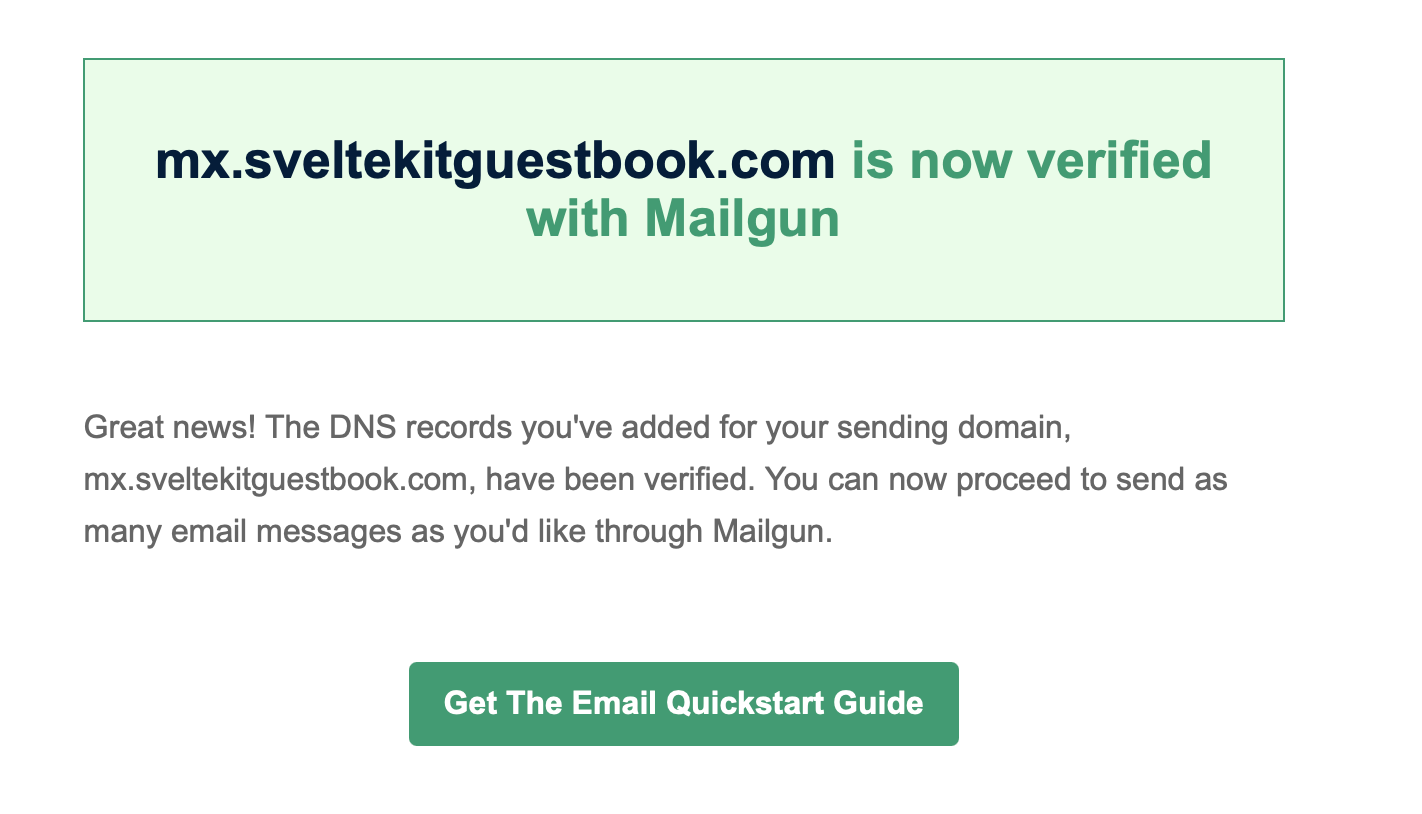
Once you’ve added the DNS records, you should be able to press a “verify” button in Mailgun. If you chose “Use automatic sender security”, this will be disabled for a couple minutes. Finally, you’ll receive an email (of course):
Once you’ve received the verification email, return to Mailgun and under your domain, find Sending Keys and create a new one. Copy this key into your .dev.vars (for preview environment) and let’s also set it in Cloudflare Worker.
MAILGUN_API_KEY=[copy from mailgun]MAILGUN_DOMAIN=[copy from domains] # e.g. mx.sveltekitguestbook.com$ pnpm exec wrangler secret put MAILGUN_API_KEY$ pnpm exec wrangler secret put MAILGUN_DOMAINFinally we’ll need to update our auth.ts sendVerificationOTP method:
async sendVerificationOTP({  email,  otp,  type}) {  if (type === "sign-in") {                // pnpm dev, vite's dev server sets NODE_ENV to development                if (env.NODE_ENV === "development") {                  console.log(`Sending OTP for sign-in to ${email}: ${otp}`);                } else {                  if (!env.MAILGUN_API_KEY || !env.MAILGUN_DOMAIN) throw new Error("Mailgun not configured correctly.");
                  const formData = new FormData();                  formData.append('from', 'SvelteKit Guestbook <noreply@sveltekitguestbook.com>');                  formData.append('to', email);                  formData.append('subject', 'Your OTP for sveltekitguestbook.com');                  formData.append('html', `<p>Your OTP for sign-in is <strong>${otp}</strong></p>`);
                  await fetch(`https://api.mailgun.net/v3/${env.MAILGUN_DOMAIN}/messages`, {                    method: 'POST',                    headers: {                      'Authorization': `Basic ${Buffer.from(`api:${env.MAILGUN_API_KEY}`).toString('base64')}`,                    },                    body: formData,                  });                }              }},
If you try running pnpm preview and sign up using your actual email, you’ll receive the following email:

Woohoo! It worked.
Should we push this to production? Not yet. It will work just fine. As I mentioned earlier though, malicious actors will abuse your email forms to spam emails. In order to prevent that, we’ll add Turnstile. Cloudflare’s captcha solution.
Cloudflare Turnstile
The infamous Cloudflare Turnstile widget. You’ll see it on countless websites these days. And for good reason. It’s really hard for bots to bypass.
How many times have you seen this?
Using BetterAuth, it’s incredibly simple to implement. Let’s start with creating a new Turnstile Widget in the Cloudflare Dashboard. Find the Turnstile menu item, or use the search bar. Then click Add Widget.
Give it a name, mine is called “SvelteKit Guestbook Widget”. You can use up to 10 different domains on one widget, so a more generic name is fine too.
Then under hostnames, add your website. For us it will be sveltekitguestbook.com. We’ll also add localhost so we can test it in our preview environment.
Lastly you’ll have to select a mode. You can choose between:
- Managed (recommended)
- Non-interactive
- Invisible
Let’s go with managed. When you click Create you’ll be shown your public site-key and private secret key.
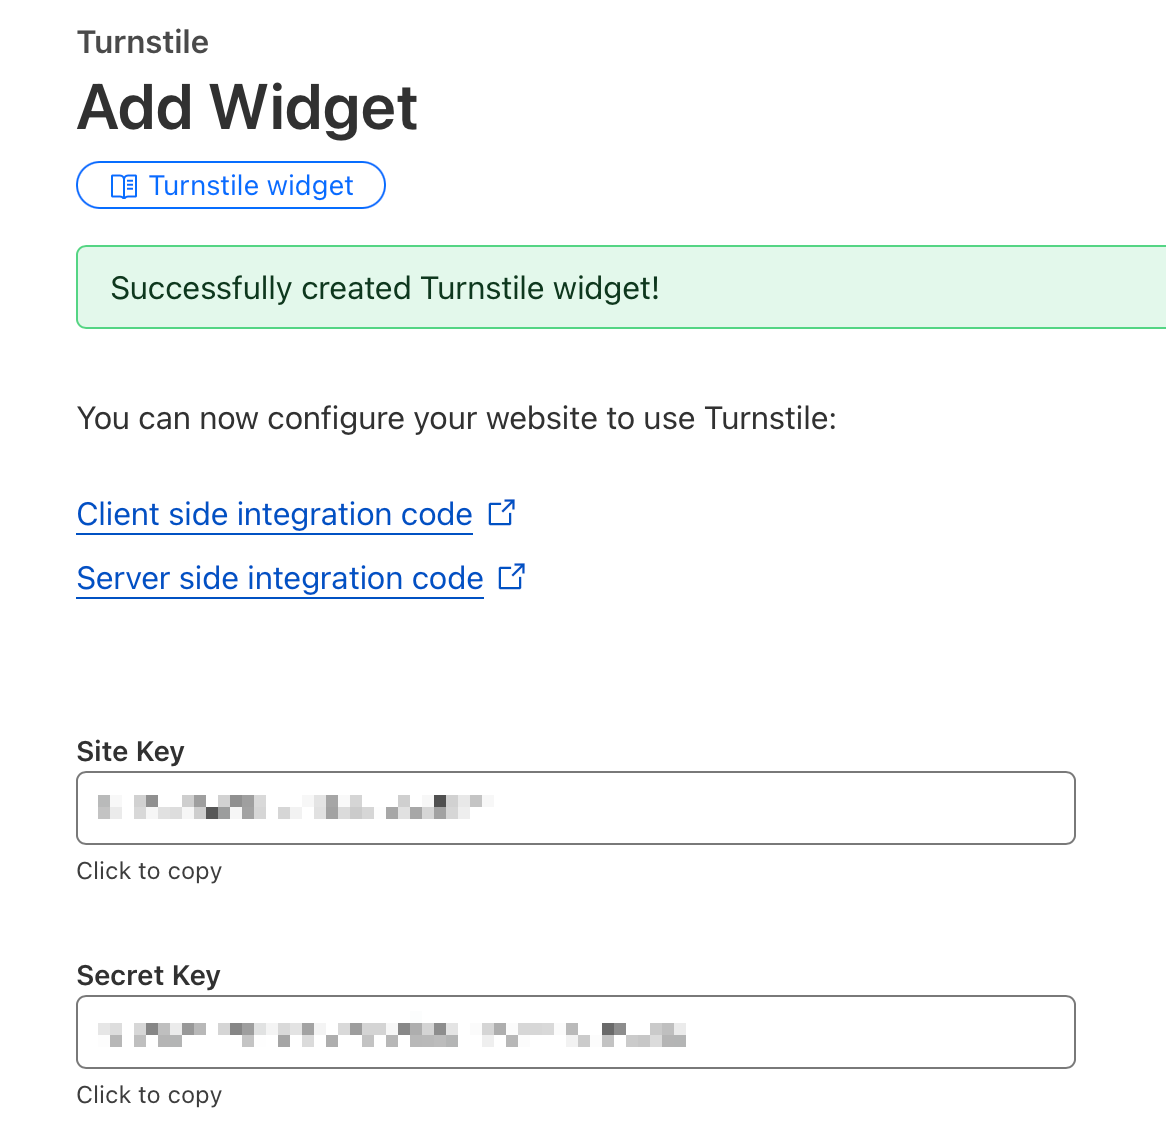
Let’s immediately set them in in our application. The site key is public, so we’ll add it to our wrangler.jsonc. Next time we’ll deploy, the environment variable will be set.
"vars": { "PUBLIC_TURNSTILE_SITE_KEY": "0x4AAAAAABHuzEr4p5Xg4PZl" },The secret key is, well, secret. We’ll add it like we have done with the other secrets
pnpm exec wrangler secret put TURNSTILE_SECRET_KEYNow for our development and preview environment, we want to use Cloudflare Turnstile test keys. Setting the PUBLIC_TURNSTILE_SITE_KEY and TURNSTILE_SECRET_KEY to these predefined values will make the challenge always pass or fail, depending on the keys you choose. Let’s go with “always passes, visible”
Open up both .env and .dev.vars and add:
TURNSTILE_SECRET_KEY=1x0000000000000000000000000000000AAPUBLIC_TURNSTILE_SITE_KEY=1x00000000000000000000AAYou can also add your real Turnstile keys to .dev.vars. That’s why we added localhost to domains. I like doing it once in a preview environment to see it working, and then set it back to the “always passing” keys.
As always, after adding environment variables and secrets, it’s time to run the TypeScript type generation script:
$ pnpm run cf-typegenGreat. Now we can add it to our application!
Adding Turnstile Captcha with BetterAuth
By now you know the drill. We’ll start by importing and configuring the Captcha plugin in auth.ts
import { captcha, emailOTP } from "better-auth/plugins";... plugins: [ captcha({ provider: "cloudflare-turnstile", secretKey: env.TURNSTILE_SECRET_KEY as string, endpoints: ['/send-verification-otp'] }), emailOTP({ .. }),By default, the captcha plugin protects /sign-up/email, /sign-in/email, and /forget-password. It’s important to note that these are BetterAuth endpoints, not your SvelteKit’s application route URLs! This confused me for a little while. The check runs in middleware and does an .includes check (source code). For our use-case, we only want to protect the “send a one-time-password email” endpoint.
Lastly we’ll need to actually add the Turnstile Widget to our email form. I’ve been using svelte-turnstile for this (GitHub), but you can also use plain JavaScript as described in Cloudflare’s Client Side Rendering docs.
$ pnpm i svelte-turnstileThis component does a lot of the not-so-heavy lifting for us. For a nice user experience, we want to disable the send-a-code button until Cloudflare has verified our user. With a few lines of code, this becomes a reality. Open up our /login/email route.
...    import { Turnstile } from "svelte-turnstile";    let otp = $state("");    let errorMessage = $state("");    let turnstileToken = $state(""); // new
async function sendOtp(event: SubmitEvent) {        ...        const { data, error } = await authClient.emailOtp.sendVerificationOtp({            email: email,            type: "sign-in",            // new            fetchOptions: {                headers: {                    "x-captcha-response": turnstileToken,                },            },        });    }...{#if formView === "email"}<form onsubmit={sendOtp}>    <label for="email">Email</label>    <input type="email" bind:value={email} name="email" />    <-- added "disabled" based on the token -->    <button type="submit" disabled={!turnstileToken}>        Send me a login code    </button>    <!-- new component -- >    <Turnstile siteKey={env.PUBLIC_TURNSTILE_SITE_KEY as string} on:callback={(event) => turnstileToken = event.detail.token} /></form>
We’ve made the following changes:
- Added a
turnstileTokenrune, that we set in the<Turnstile />componenton:callback`. - Added
fetchOptionsto thesendVerificationOtpcall. - Disabled the button if
turnstileTokenis falsy (e.g. empty or null). We could have used a$derivedrune here, but for conciseness I chose not to. - Added the
<Turnstile />widget with our public site key.
Using our passing test keys, we can see it in action locally. Notice the disabled button becomes clickable once the challenge completes.
A quick note on the svelte-turnstile component. Ideally you’d use the component with just the site-key. It will send the token to using FormData. You would then have to validate this token yourself, since direct api calls in BetterAuth (e.g. auth.api.sendVerificationToken) skips the middleware and therefore don’t check your token. This is why we are sending it using fetchOptions. As a bonus, the oncallback also allows for a nicer user-experience by disabling the button while verifying our user.
Bringing it all together
We’ve made an incredible amount of progress so far. Now we have to bring it together to make our guestbook application use authenticated users instead of just a random name.
When someone logs in using Google OAuth, we get their name. When they use a OTP, we don’t. You could add a name field in the form, but that’s silly for returning users. Instead, we’ll check if the user has a name set, and if not redirect them to a profile page. With SvelteKit this is pretty straightforward to set up.
Let’s open up the schema.ts file and modify our guestbook message table (from the previous article).
export const guestbookMessages = sqliteTable('guestbook_messages', {  id: integer().primaryKey(),  message: text().notNull(),  name: text().notNull(), // remove this  country: text(),  createdAt: text('created_at', { mode: 'text' })    .notNull()    .default(sql`CURRENT_TIMESTAMP`),  // add  userId: text('user_id').notNull().references(()=> user.id, { onDelete: 'cascade' })});
// bottom of fileexport const userRelations = relations(user, ({ many }) => ({  guestbookMessages: many(guestbookMessages),  // Optionally you could add:  // sessions: many(session),  // accounts: many(account),}));
Then we create the migration files:
$ pnpm run db:make-migrationsWe created the migrations, but we can’t run them yet. Adding a notNull field without default values is impossible if the table has records. Since we have this “It works!” message, applying migrations will fail with:
LibsqlError: SQLITE_ERROR: Cannot add a NOT NULL column with default value NULLTwo options include:
- Set a default value (e.g. a dummy user id) and potentially backfill later
- Truncate the table and start over
For our application, we can just delete all existing guestbook messages.
$ sqlite3 local.db "DELETE FROM guestbook_messages;"Now we can run our migrations.
$ pnpm run db:migrate[✓] migrations applied successfully!Great. Now we need to update the homepage’s load function to include the user. We used a Drizzle select() before, but now is a good time to use query.
We’ll also update the homepage’s actions to make sure the user is authenticated and has a name set before they post.
export const load: PageServerLoad = async ({ request, locals }) => {    const session = await locals.auth.api.getSession({        headers: request.headers,      });      // new      const messages = await locals.db.query.guestbookMessages.findMany({        orderBy: desc(guestbookMessages.createdAt),        with: {          user: {            columns: {              name: true,            },          },        },      });
    return {        messages,        session,    };};
export const actions: Actions = {    default: async ({ request, platform, locals}) => {        const session = await locals.auth.api.getSession({            headers: request.headers,          });
        if (!session?.user) {            return { success: false, error: 'Unauthorized' };        } else if (!session.user.name || session.user.name.length < 3) {            return { success: false, error: 'Name must be at least 3 characters long' };        }
        const formData = await request.formData();        const message = formData.get('message');        const country = platform?.cf?.country ?? 'Unknown';        // removed "name"
        await locals.db.insert(guestbookMessages).values({            message: message as string,            country: country as string,            userId: session.user.id, // used session userId        });
        return { success: true };    }}
Ideally you would separate the Drizzle calls into either repositories (e.g. userRepository, messageRepository) or queries.ts. For the purpose of this article, I run all the queries inside their view method.
Next we need to update the homepage’s view:
<div>  {#each data.messages as message}    <div class="message">      // This was "message.name", now "message.user.name"      <h3>{message.user.name} ({message.country})</h3>      <p>{message.message}</p>      <span class="date">Posted on {message.createdAt}</span>    </div>  {:else}    <p>No messages yet</p>  {/each}</div>
{#if data.session?.user.name}// only post when authenticated and with a user name<form method="post" use:enhance>    <div>      <label for="msg">Message</label>      <textarea id="msg" bind:value={message} name="message"></textarea>      <span class="count">{characterCount} characters</span>    </div>    <button type="submit" disabled={characterCount < 5}>Post</button></form>// if authenticated but not user name (e.g. social auth with an empty name){:else if data.session}<p>You need to configure a name to post in the guestbook</p><a href="/profile">Configure name</a>{:else}// not logged in at all<p>You need to <a href="/login">login</a> to post in the guestbook</p>{/if}
We’re pointing to a new route (/profile) that we haven’t created yet. Let’s quickly created it.
<script lang="ts">    import type { PageProps } from "./$types";
    let { data, form }: PageProps = $props();</script>
<h1>Profile</h1>
{#if !data.user.name}    <h2>A name is required post in the guestbook</h2>{/if}
<form method="post">    <input type="text" name="name" minlength={3} maxlength={20} bind:value={data.user.name} />    <button type="submit">Save</button>
    {#if form?.success}        <p>Saved</p>    {/if}
    {#if form?.error}        <p>{form.error}</p>    {/if}</form>
<a href="/">Home</a>
And a new +page.server.ts:
import { fail, redirect, type Actions } from "@sveltejs/kit";import { user } from "$lib/server/db/schema";import { eq } from "drizzle-orm";
async function requireSession(locals: App.Locals, request: Request) {    const session = await locals.auth.api.getSession({ headers: request.headers });
    if (!session?.user) {        throw redirect(302, "/login");    }
    return session;}
export async function load({ request, locals }) {    const session = await requireSession(locals, request);    return { user: session.user };}
export const actions: Actions = {    default: async ({ request, locals }) => {        const session = await requireSession(locals, request);
        const formData = await request.formData();        const name = formData.get("name");
        if (!name || typeof name !== "string") {            return fail(400, { name, error: "Name is required" });        }
        await locals.db.update(user).set({ name }).where(eq(user.id, session.user.id));
        return { success: true };    }}
We created a little helper function called requireSession. You might want to add this to your hooks.server.ts so you can call const session = await requireSession(request), but for conciseness I chose to only put it in this file.
One final change we’ll make is to the success handler of our OTP verify function. We’ll check if the authenticated user has a name, and if not, we’ll redirect them to the profile page. If they do, they’ll go back to the homepage:
async function verifyOtp(event: SubmitEvent) { ... if (data?.user) { if (data.user.name.length > 3) { goto("/", { invalidateAll: true }); } else { goto("/profile", { invalidateAll: true }); } } else { errorMessage = error?.message || 'An unknown error occurred'; } }
Now we’re talking! In order to test this out in our preview environment, we’ll have to remove any existing messages and run the migrations:
$ pnpm exec wrangler d1 execute guestbook-db --command "DELETE FROM guestbook_messages"$ pnpm exec wrangler d1 migrations apply guestbook-db$ pnpm run previewAnd the same for production:
$ pnpm exec wrangler d1 execute guestbook-db --command "DELETE FROM guestbook_messages" --remote$ pnpm exec wrangler d1 migrations apply guestbook-db --remoteWe’ve reached the end! All that’s left is to run a last deploy, and we’ll have created a fully working application in Cloudflare Workers!
$ pnpm run deployConclusion
In the previous post, we created a simple guestbook on Cloudflare Workers using a workers.dev domain. Now we’ve expanded that guestbook significantly by:
- Buying and setting up a public domain
- Setting up Google OAuth
- Setting up One-Time-Password login
- Sending real emails to real users
- Protecting our emails from bots using Turnstile
- Allowing posting only by authenticated users with a name
A lot of this was made possible by the amazing BetterAuth project. It would have taken significantly longer to implement each of the above features without it.
With this knowledge, you should be able to create full stack SvelteKit applications on the Cloudflare Workers free tier. Most of this knowledge also translates to hosting your applications on a VPS (future article, maybe?).
You can interact with the guestbook yourself to see it in action at https://sveltekitguestbook.com. I’ve made a small change to remove the “name” field and instead require the authenticated user to have a name. It was a trivial change and outside the scope of this article.
Let me know what you think on X @Jilles!