Setting up Spring JDBC and SQLite with Write-Ahead-Logging mode
When you create a new project using Spring Initializr, there is no straightforward way to set it up with SQLite. This is a shame as SQLite is a really good option for small to medium applications with Write-Ahead-Log (WAL) mode enabled.
In this article, we’ll go through the steps to set up a new Spring Boot application with SQLite as the driving database.
Spring Initializr
The Spring Initialzr is one of the best ways to start a new Spring Boot project. Unfortunately there are no SQLite options in the provided dependencies list. We’ll have to create one with just Spring JDBC. Our package will look like this:
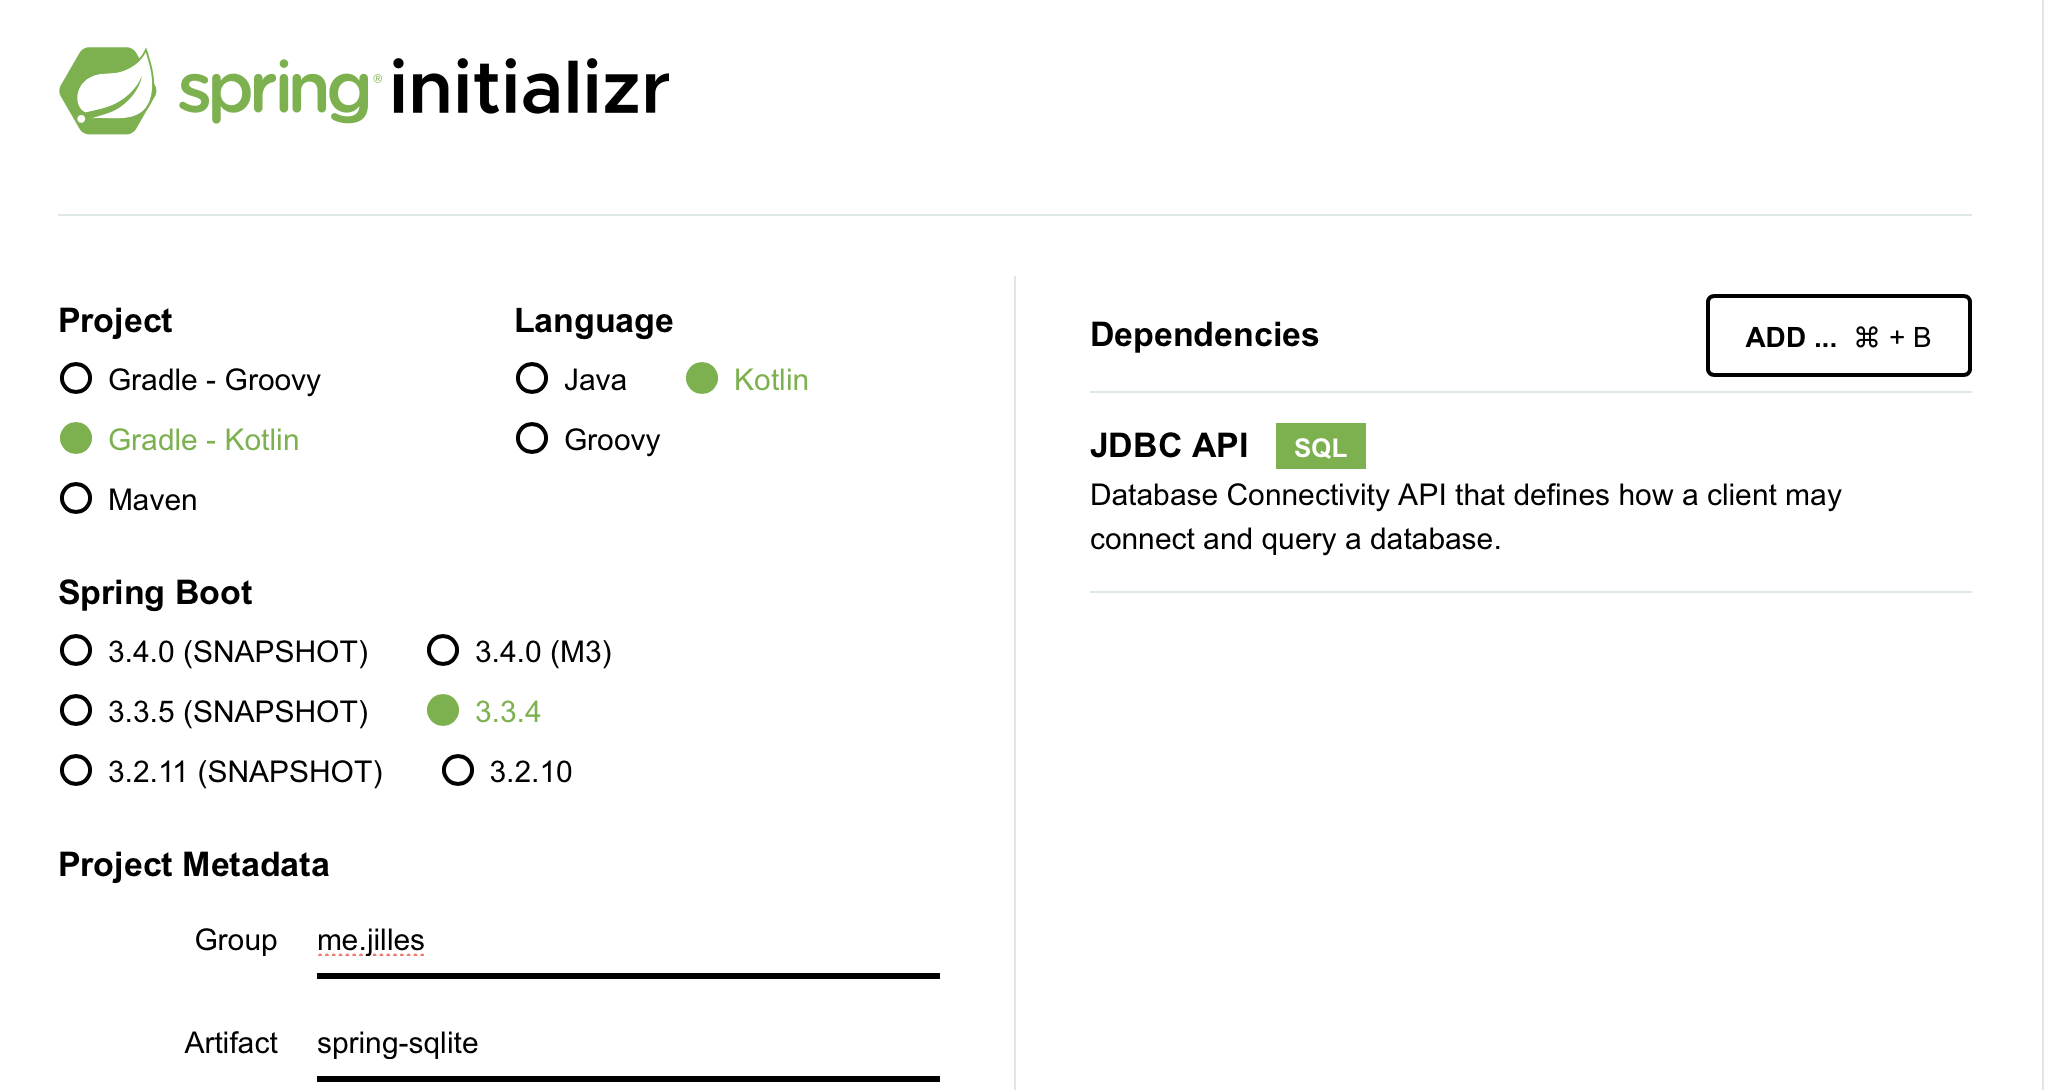
Figure 1. Spring Initialzr
We’ve selected Gradle (Kotlin) as our build system, Kotlin as our language and Spring Boot version 3.3.4 because it’s the highest non-milestone and non-snapshot release at the time of writing.
Adding SQLite
One of the many benefits of Spring Boot is the mature Java ecosystem. It’s not unlikely that your problem has already been solved by an enterprise and maintained for 20+ years. The JDBC SQLite driver is currently the 5th most popular JDBC driver on Maven Central:
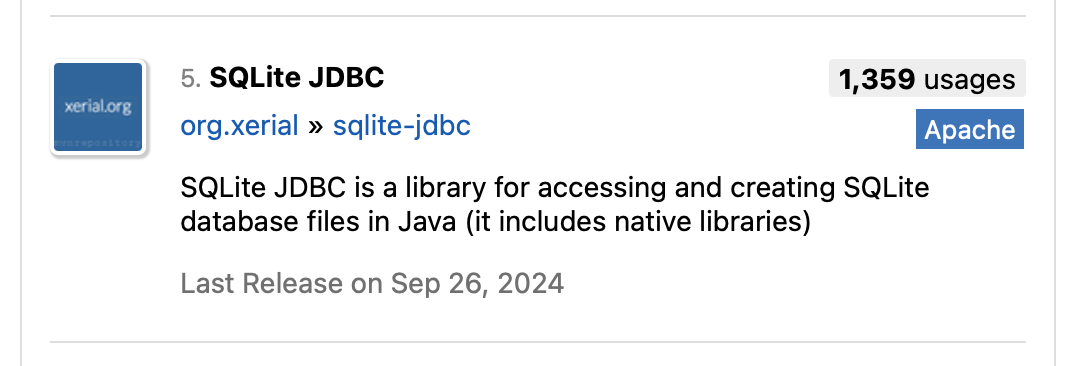
Figure 2. SQLite JDBC on Maven Central
From the detail page we can get the latest version and the dependency definition that we can paste straight into our build.gradle.kts.
// https://mvnrepository.com/artifact/org.xerial/sqlite-jdbcimplementation("org.xerial:sqlite-jdbc:3.46.1.3")After loading our dependencies we can try and start our application:
2024-10-13T19:04:23.907-05:00 ERROR 45284 --- [spring-sqlite] [           main] o.s.b.d.LoggingFailureAnalysisReporter   :
***************************APPLICATION FAILED TO START***************************
Description:
Failed to configure a DataSource: 'url' attribute is not specified and no embedded datasource could be configured.
Reason: Failed to determine a suitable driver class
Action:
Consider the following:  If you want an embedded database (H2, HSQL or Derby), please put it on the classpath.  If you have database settings to be loaded from a particular profile you may need to activate it (no profiles are currently active).
The error is pretty descriptive, we’ll just have to add the URL to our application.properties:
spring.application.name=spring-sqlitespring.datasource.url=jdbc:sqlite:db.sqlitesrc/main/resources/application.properties
Our application will start successfully! However, no db.sqlite is to be found. How do we know if it works?
Querying using Spring JDBC’s JdbcTemplate
The simplest query I can think of is SELECT 1; which will return 1 if the connection is successful. Since this article is only about setting up Spring JDBC with SQLite, I will @Autowire in the JdbcTemplate. In all modern Spring project, you should use constructor injection instead. We’ll also extend the CommandLineRunner interface to run our queries without having to set up a @RestController.
@SpringBootApplicationclass SpringSqliteApplication : CommandLineRunner {  @Autowired  lateinit var jdbcTemplate: JdbcTemplate
  override fun run(vararg args: String?) {    val result = jdbcTemplate.queryForObject("SELECT 1", Int::class.java)    check(result == 1) { "SQLite is not working" }    println("It works!")  }}
fun main(args: Array<String>) {  runApplication<SpringSqliteApplication>(*args)}
src/main/kotlin/…/main.kt
When we run this application, we should see “It works!”. Otherwise it will throw an IllegalStateException with our provided message. (Isn’t Kotlin awesome?!)
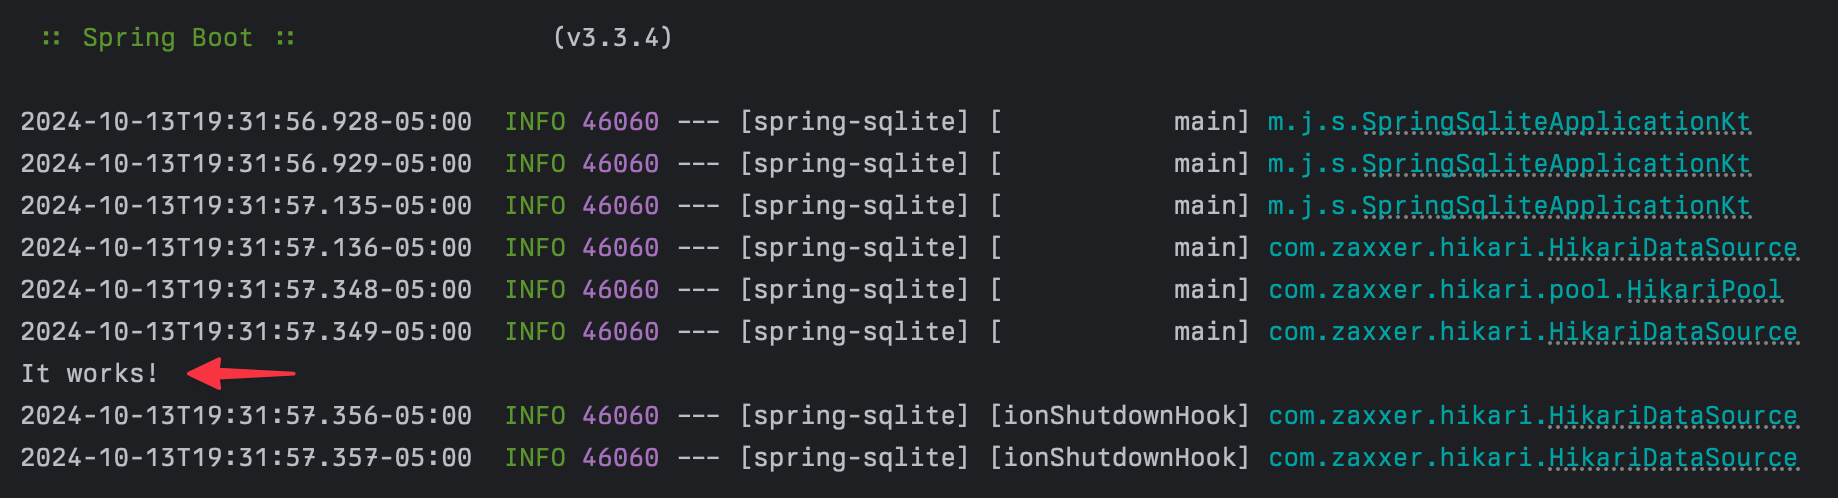
Figure 3. Success
We now have a db.sqlite in our application’s root folder.
Great, but where is the database schema?
Providing a schema.sql
Spring Boot Auto-configure brings a very handy DataSourceInitializer class to the mix. It will look for a schema.sql file in our resources, and it will apply it when our application starts.
By default though, it only runs for embedded databases. Isn’t SQLite is an embedded database? It is. But it’s not one supported by default. The only 3 embedded databases supported out of the box are: HSQL, H2 and Derby according to the Spring JDBC documentation.
We have 2 options:
- Create a
DataSourceusingEmbeddedDatabaseBuilder - Set
DatabaseInitializationModetoALWAYS.
Let’s go for the simplest option: option 2. All we have to do is update our application.properties:
spring.application.name=spring-sqlitespring.datasource.url=jdbc:sqlite:db.sqlitespring.sql.init.mode=alwaysapplication.properties
Now Spring Boot Autoconfigure will run any sql in resources/schema.sql and optionally a resources/data.sql to populate it. For demonstration purposes, we’ll use a simple tasks table:
CREATE TABLE IF NOT EXISTS tasks( id INTEGER PRIMARY KEY AUTOINCREMENT, body TEXT NOT NULL, deadline DATETIME, is_completed BOOLEAN NOT NULL DEFAULT 0, created_at DATETIME NOT NULL DEFAULT CURRENT_TIMESTAMP);resources/schema.sql
Remember to use IF NOT EXISTS as the database initialization process will run on every application run.
We can restart our application and will still see our “It works!” message. If we open up our SQLite database, you’ll that our tables are created:
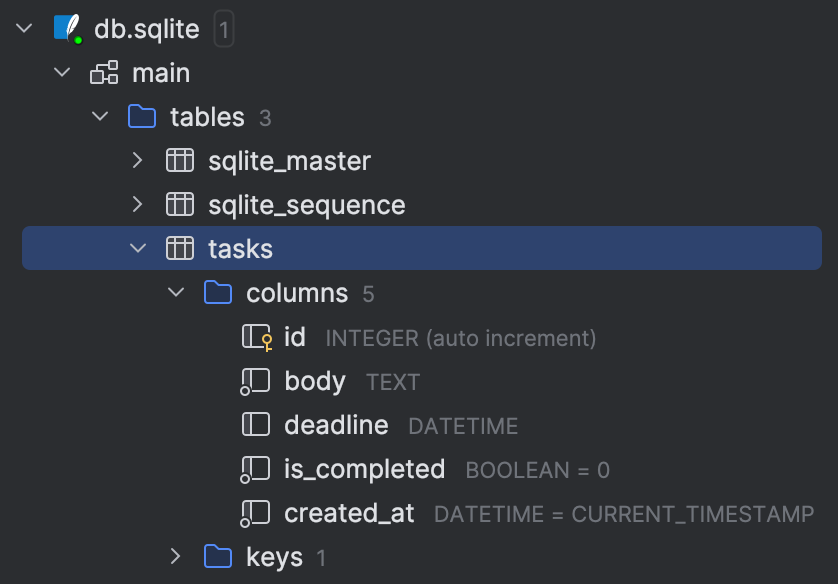
Figure 4. db.sqlite with schema
Note that you won’t have to do this if you have an existing SQLite database you want to use with Spring. Even more so, for production applications you should consider using migrations. You can read my article about Flyway migrations for Everyone here.
Production Ready SQLite
In the introduction of this article I mentioned using Write-Ahead-Logging as a SQLite journal mode. This logs every write operation into a .wal file, so that your writes don’t block reads. This makes SQLite a viable choice for small to medium read-heavy projects. Imagine creating a single binary using GraalVM that writes to your SQLite database that is continuously backed up using Litestream!
Enabling Write Ahead Logging (WAL) using Hikari
Spring JDBC comes with HikariCP as a dependency, which is used for connection pooling. We can use the connectionInitSql setting per the HikariCP documentation.
This property sets a SQL statement that will be executed after every new connection creation before adding it to the pool. If this SQL is not valid or throws an exception, it will be treated as a connection failure and the standard retry logic will be followed. Default: none
Great, this is just what we need. We’ll set the following SQLite options using PRAGMA statements:
- Journal Mode: WAL
- Synchronous: Normal (default is FULL)
- Cache Size: -10000 (10mb)
- Temporary Storage: Memory
The following blog post by phiresky on SQLite performance tuning does a good job explaining these values. It is out of scope for this article.
Let’s update our application.properties.
spring.application.name=spring-sqlitespring.datasource.url=jdbc:sqlite:db.sqlitespring.datasource.hikari.connection-init-sql=\ PRAGMA journal_mode=WAL;\ PRAGMA synchronous=NORMAL;\ PRAGMA cache_size=-10000;\ PRAGMA temp_store=MEMORY;spring.sql.init.mode=alwayssrc/main/resources/application.properties
Now on every connection, HikariCP will execute the above PRAGMA commands.
Verifying our changes
With all our changes in place, it’s time to save a task using Spring JDBC into SQLite. We’ll create a data class to hold our task and a simple save method to save it.
Note that Spring JDBC is not Spring Data JDBC. In Spring Data JDBC you would create a TaskRepository interface. Spring Data JDBC does currently not support SQLite.
data class Task(  val id: Int,  val body: String,  val isCompleted: Boolean,  val deadline: Instant?,)
fun save(body: String, deadline: Instant?): Task {    val sql = """        INSERT INTO tasks (body, deadline)        VALUES (:body, :deadline)    """.trimIndent()
    val keyHolder = GeneratedKeyHolder()    val params = MapSqlParameterSource(        mapOf(            "body" to body,            "deadline" to deadline?.toString()        )    )
    NamedParameterJdbcTemplate(jdbcTemplate).update(sql, params, keyHolder)    val id = requireNotNull(keyHolder.key)
    return Task(id.toInt(), body, false, deadline)}
override fun run(vararg args: String?) {    val task = save("Publish Spring JDBC and SQLite Article", Instant.now().plusSeconds(3600))    print("Saved task: $task")}
This will add our task successfully to the SQLite database.

Figure 5. Successful Write
Which matches the output:
Saved task: Task(id=1, body=Publish Spring JDBC and SQLite Article, isCompleted=false, deadline=2024-10-14T16:33:10.234738Z)2024-10-14T10:33:10.243-05:00 INFO 47922 --- [spring-sqlite] [ionShutdownHook] com.zaxxer.hikari.HikariDataSource : HikariPool-1 - Shutdown initiated...Instead of just having db.sqlite, we now also have the -wal file and shared memory -smh file:
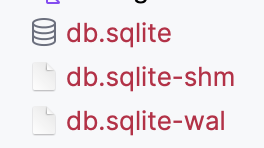
Figure 6. SQLite with WAL enabled