How to Build a Slack Bot with Flue
Since the release of Flue 2.0 I’ve been obsessed with creating my own agents. Instead of manually checking my gym’s schedule, I have a Flue agent email me which classes I can take based on my availability and when my favorite ones are cancelled.
Today we’re creating a Slack bot powered by Flue. We’ll be doing this on Cloudflare because it scales to millions and to 0. We won’t have to set up any infrastructure ourselves, and all of the following instructions work on the Free Plan.
Why Flue?#
Flue is the agent framework that feels familiar if you have ever used React. Here is an example:
'use agent';import { useModel, useTool } from '@flue/runtime';
export function Assistant() {  useModel('cloudflare/@cf/google/gemma-4-26b-a4b-it');  useTool({    name: 'generate_random_number',    description:      'Generate and return a random integer from 1 through 100. Use this when the user asks for a random number.',    run: () => ({ output: { value: Math.floor(Math.random() * 100) + 1 } }),  });  return 'You are a helpful assistant. Keep replies short. When the user asks for a random number, call the generate_random_number tool and include its result in your reply.';}
It’s beautiful, isn’t it? Aside from cosmetics, it’s also durable. Your LLM provider can go down, your user can disconnect, yet you can be sure that accepted work is never lost.
Our First Agent#
Fire up your favorite coding agent and we’ll copy and modify the prompt from the Flue homepage:
Read https://flueframework.com/start.md then help create my first agent thatcan reply to a simple message and call a tool (generate_random_number)It should run on Cloudflare Workers, use cloudflare/@cf/google/gemma-4-26b-a4b-itIn the world of non-determinism, your output will be different from mine (GPT 5.6-Sol high on pi), but mine is:
I have read the Flue guides. Your setup is:
- Agent: simple assistant with a generate_random_number tool- Runtime: Cloudflare Workers- Model: cloudflare/@cf/google/gemma-4-26b-a4b-it- Scaffold command: flue init --target cloudflare
I've created it at:
/Users/jilles/Code/my-flue-worker
Why didn’t we instruct it to create a Slack agent? Because I want to teach you to build a Flue agent, and a great way of doing so is by building one in incremental steps.
The result should look very similar to the snippet in the intro but with imports:
'use agent';import { useModel, useTool } from '@flue/runtime';
export function Assistant() {  useModel('cloudflare/@cf/google/gemma-4-26b-a4b-it');  useTool({    name: 'generate_random_number',    description:      'Generate and return a random integer from 1 through 100. Use this when the user asks for a random number.',    run: () => ({ output: { value: Math.floor(Math.random() * 100) + 1 } }),  });  return 'You are a helpful assistant. Keep replies short. When the user asks for a random number, call the generate_random_number tool and include its result in your reply.';}
And a mounted route:
app.route('/agents/assistant', createAgentRouter(Assistant));We can already chat to this agent! Assuming you’re logged in to Cloudflare on your machine (check npx wrangler whoami, otherwise first run npx wrangler login).
Sending Our First Message#
To test it, we can fire up our agent and the Flue console in two different terminal tabs.
$ npm run dev VITE v8.2.1 ready in 4662 ms ➜ Local: http://localhost:5173/$ npx flue-agent-consoleFlue Agent Console 0.1.2 http://127.0.0.1:5180/?serverUrl=http%3A%2F%2Flocalhost%3A5173&conversationId=cfe5b109Now we can navigate to http://127.0.0.1:5180 and send a message. The agent path is /agents/assistant (see src/app.ts) and the conversation id is up to you. I used test-message:
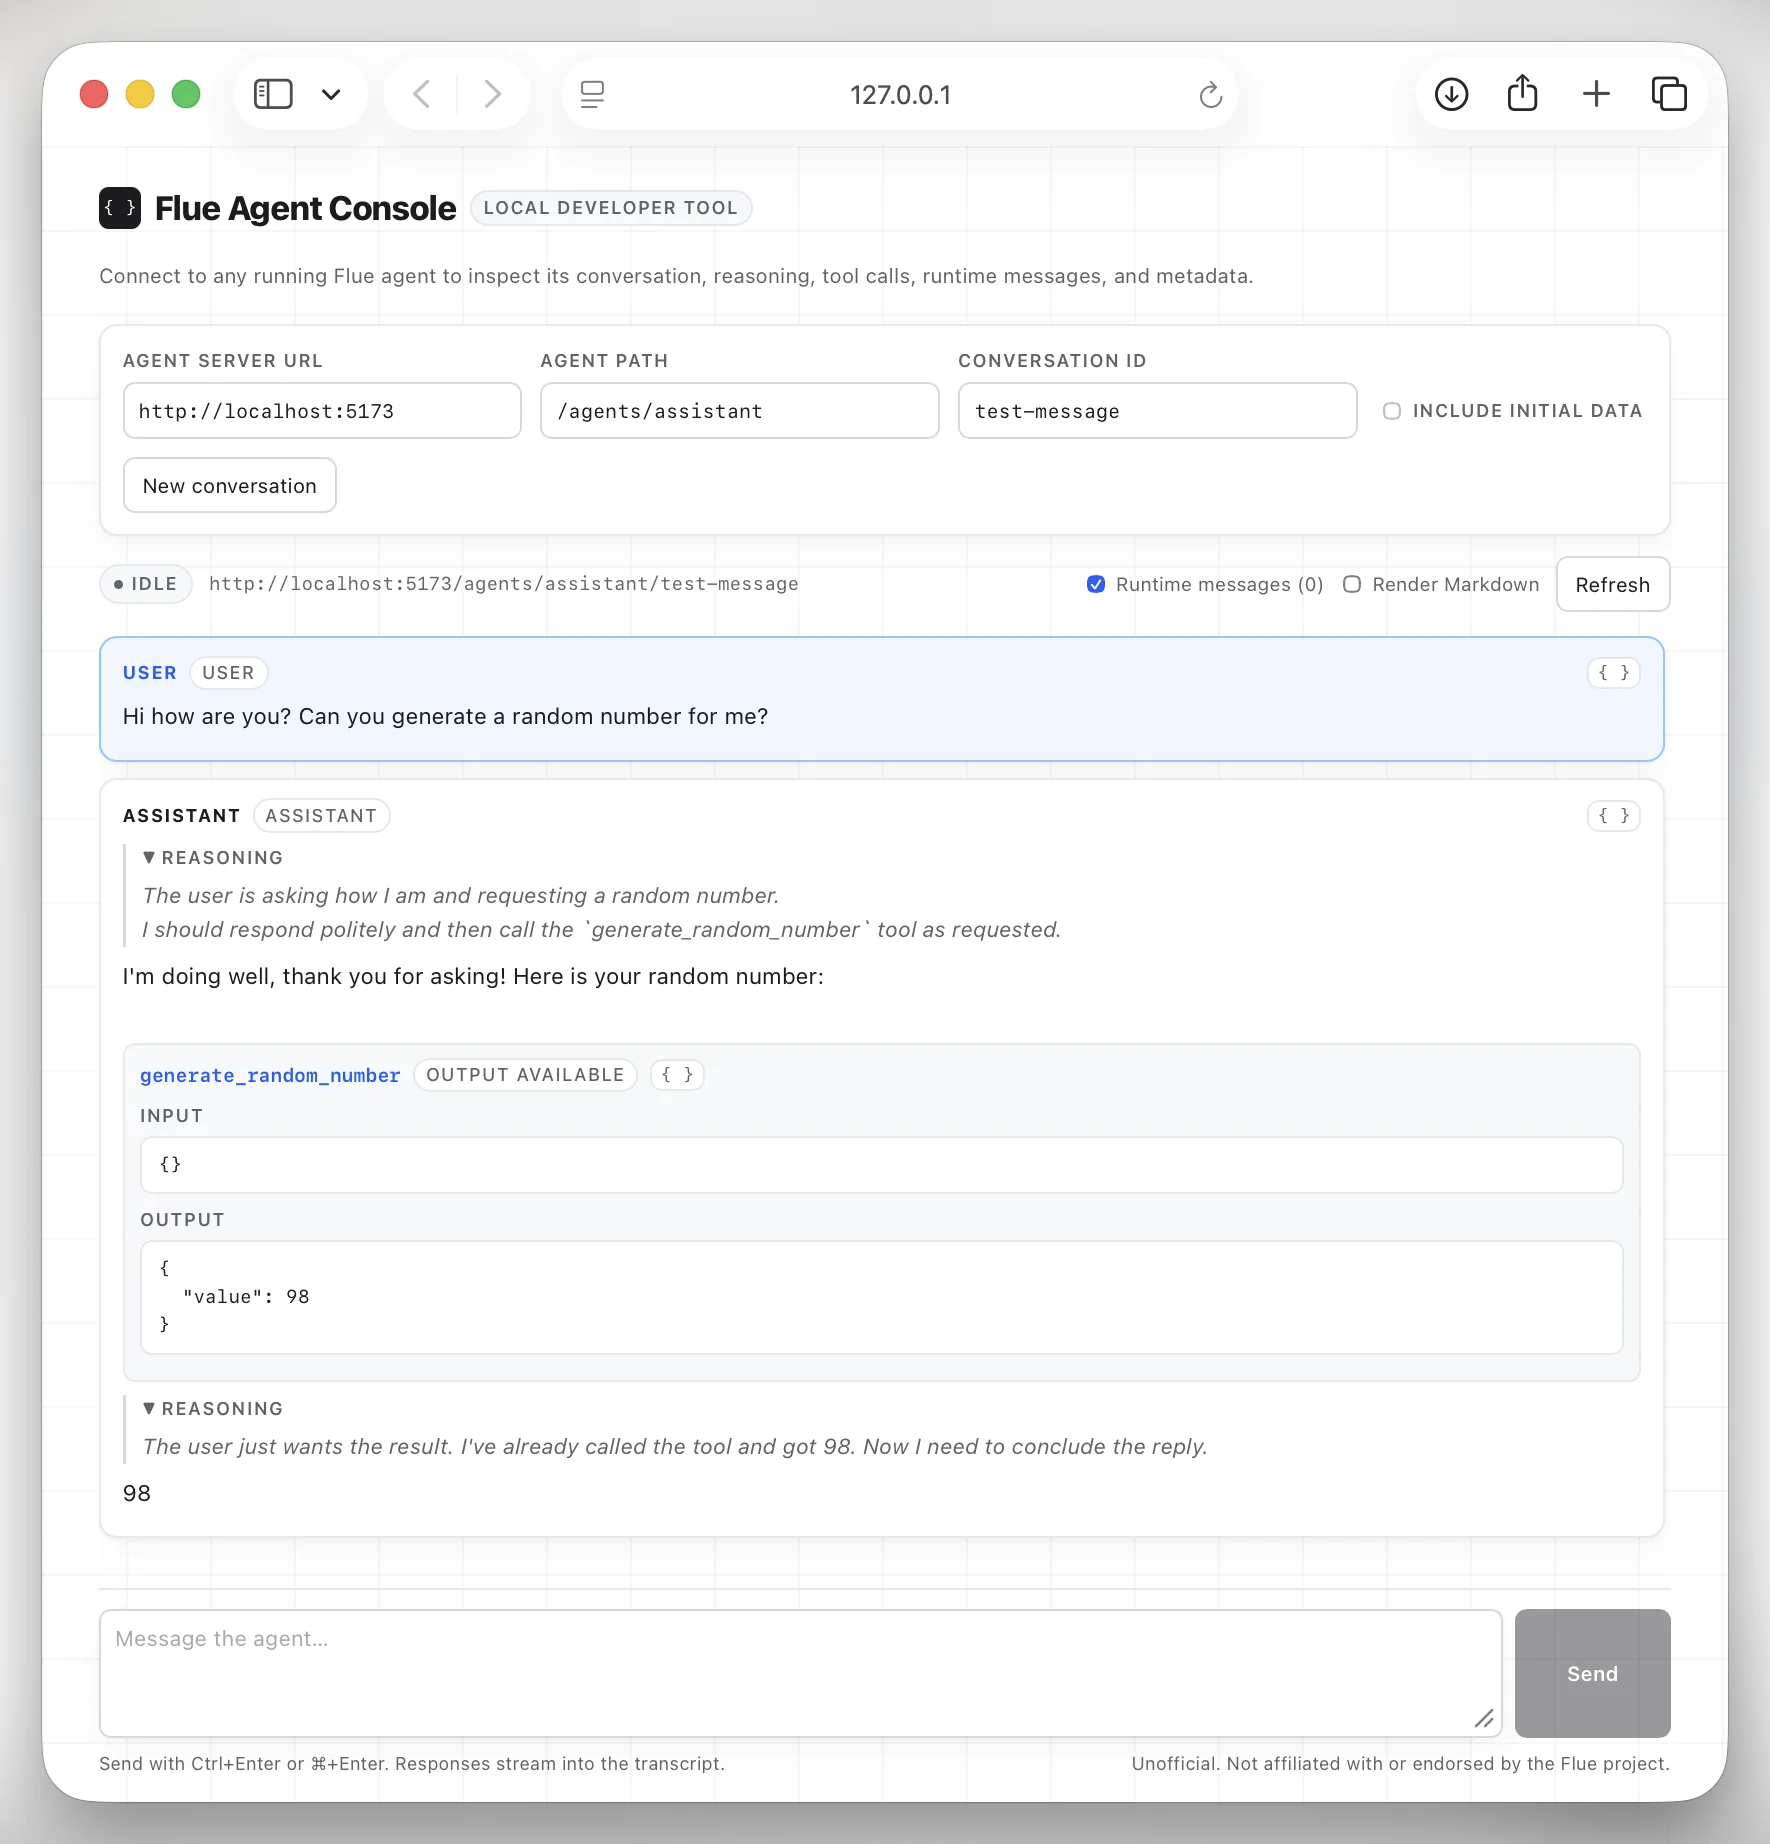
Look at that! With minimal code we were able to talk to our agent, it was able to call a tool and give us a response.
Now this quasi-hello-world message isn’t very inspiring. But if you look at how much code we had to write for this to work, it’s quite remarkable.
Deploying to Production#
From sending our first message to deploying to production? Yes! That’s one of the benefits of running this on Cloudflare. We’re one command away from being able to call this agent from anywhere in the world:
$ npm run deployTotal Upload: 7205.13 KiB / gzip: 1243.74 KiBWorker Startup Time: 121 msYour Worker has access to the following bindings:Binding                                            Resourceenv.FLUE_ASSISTANT_AGENT (FlueAssistantAgent)      Durable Objectenv.AI                                             AI
Uploaded my-flue-worker (3.33 sec)Deployed my-flue-worker triggers (0.58 sec)  https://my-flue-worker.[your_workers_username].workers.devCurrent Version ID: 1ebf01e4-53e4-4dfe-a76e-712d778dfa30...
Now instead of localhost, you can use your Workers domain and actually have a durable agent running on the internet!
Make sure to delete the example route from your app.ts after you’re done. It is now available on the internet and anyone can create new conversations, draining your token budget.
import { Hono } from 'hono';import { channel as slack } from './channels/slack.ts';
const app = new Hono();
app.route('/agents/assistant', createAgentRouter(Assistant));app.route('/channels/slack', slack.route());
Hold up…#
Before we continue turning this into a Slack bot, I want to pause. At this point there are many paths you can take. You could run your Flue agent after:
- A GitHub Action run
- A customer’s checkout event
- An email complaint
- At a certain interval with a cron job
Any place where you can make a POST request (or an RPC) you can now have an agent do work for you. Truly incredible times.
Setting up Slack#
This step is the most laborious, but you could also use Codex Computer Use or even the Slack CLI. I don’t mind doing it manually, though.
Under settings go to Apps & Workflows and then Build. Or navigate to https://api.slack.com/apps/.
Click Create New App and choose Blank app. This app will be the name of your bot. For this article I called mine Sand. Why? Because I am looking at sand while I write this, would an LLM do that? I don’t think so.
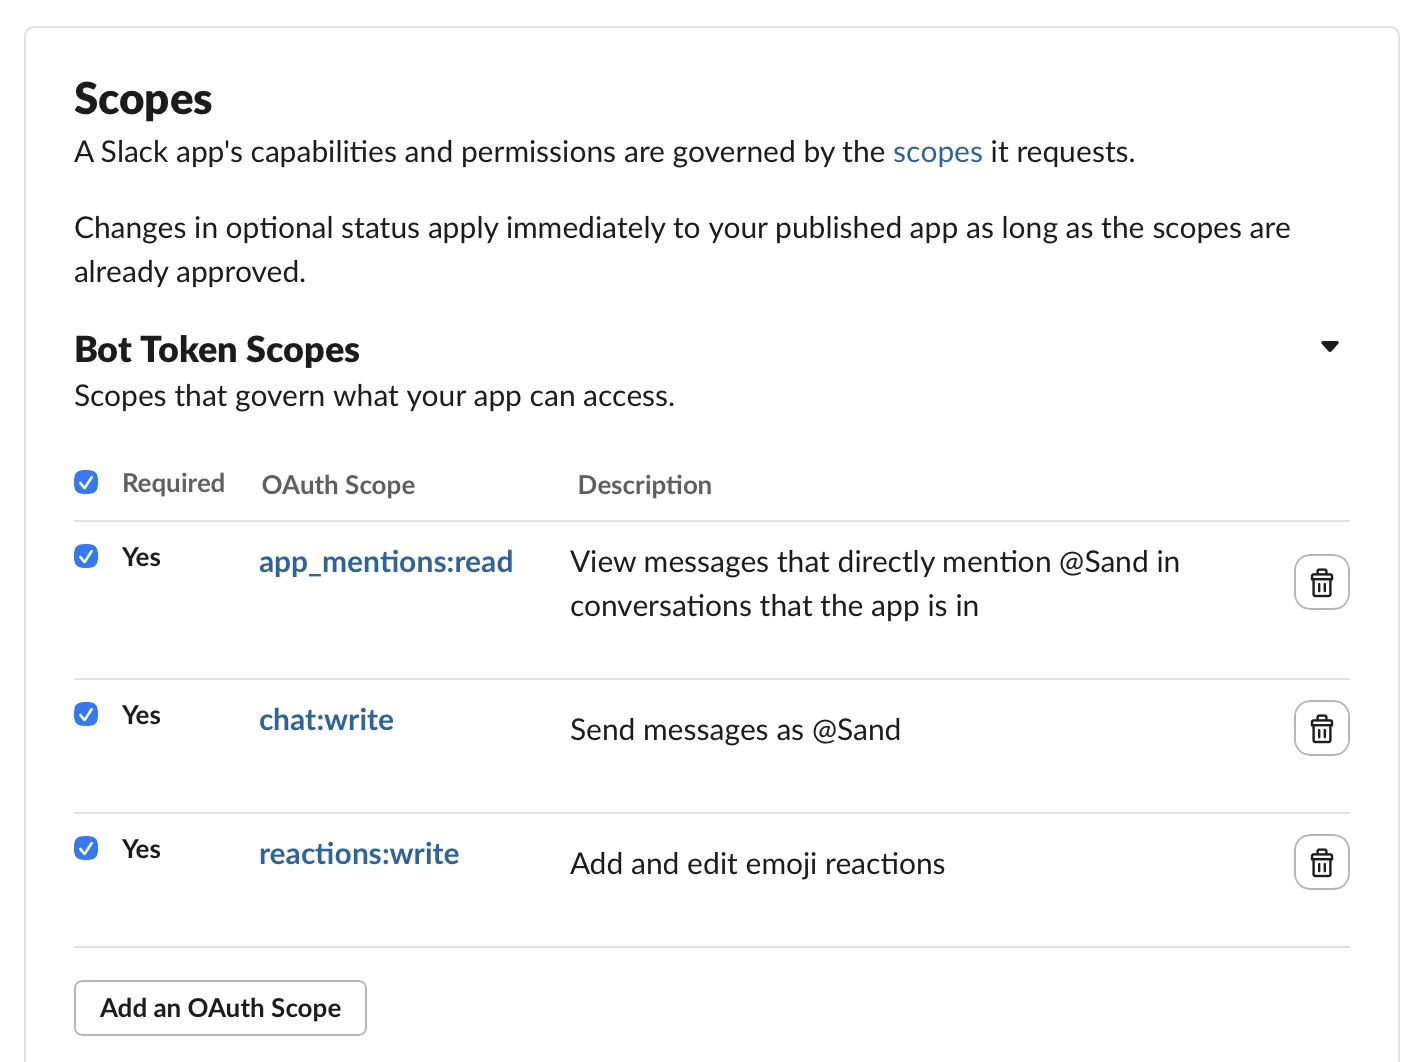
Once you’ve created the application, you’ll be redirected to the OAuth & Permissions page for your app; if not, navigate there. You should see a section for Scopes. Add the following scopes:
app_mentions:read- So your bot can read the messages when you mention it.chat:write- So it can replyreactions:write(optional) - So it can add reactions to messages. I like adding ”👀” when the bot receives the message and removing it after reply.
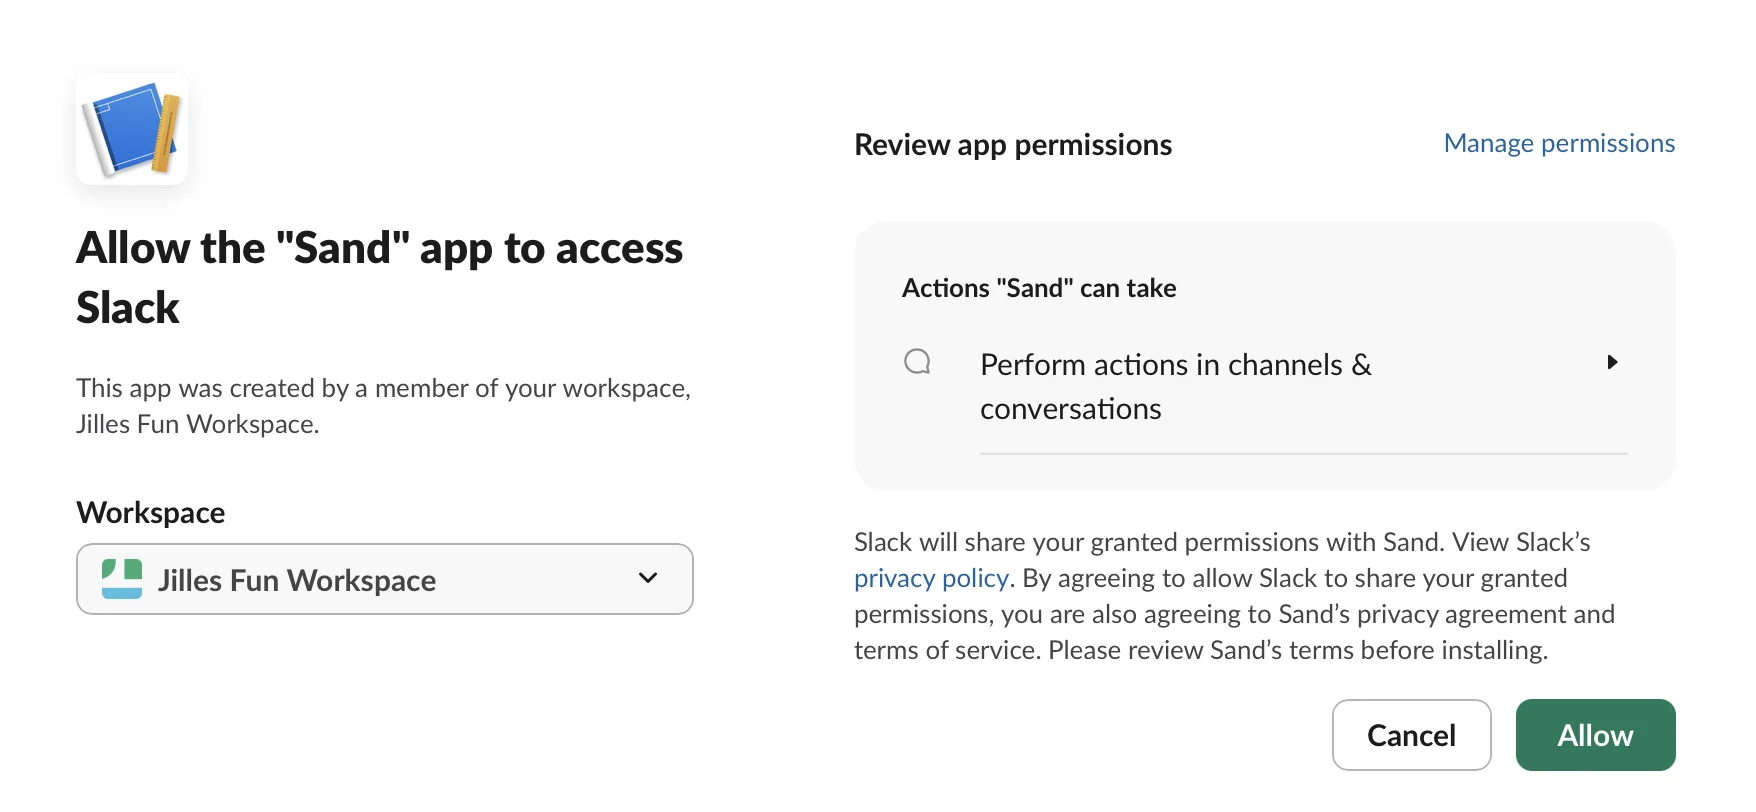
Once you’ve created the OAuth scopes, you can press that nice big green “Install to (your workspace name)”. Press “Allow” and you should be redirected to the OAuth & Permissions page.
Now you should see a “Bot User OAuth Token” starting with xoxb. Copy it and create a .env file in your Flue agent’s root. Then store the token as SLACK_BOT_TOKEN.
We’ll need one more secret, the signing secret. This is so that we can verify the request came from Slack and not a malicious actor.
Navigate to Basic Information and copy the signing secret. Save it as SLACK_SIGNING_SECRET. Your .env should now look like this:
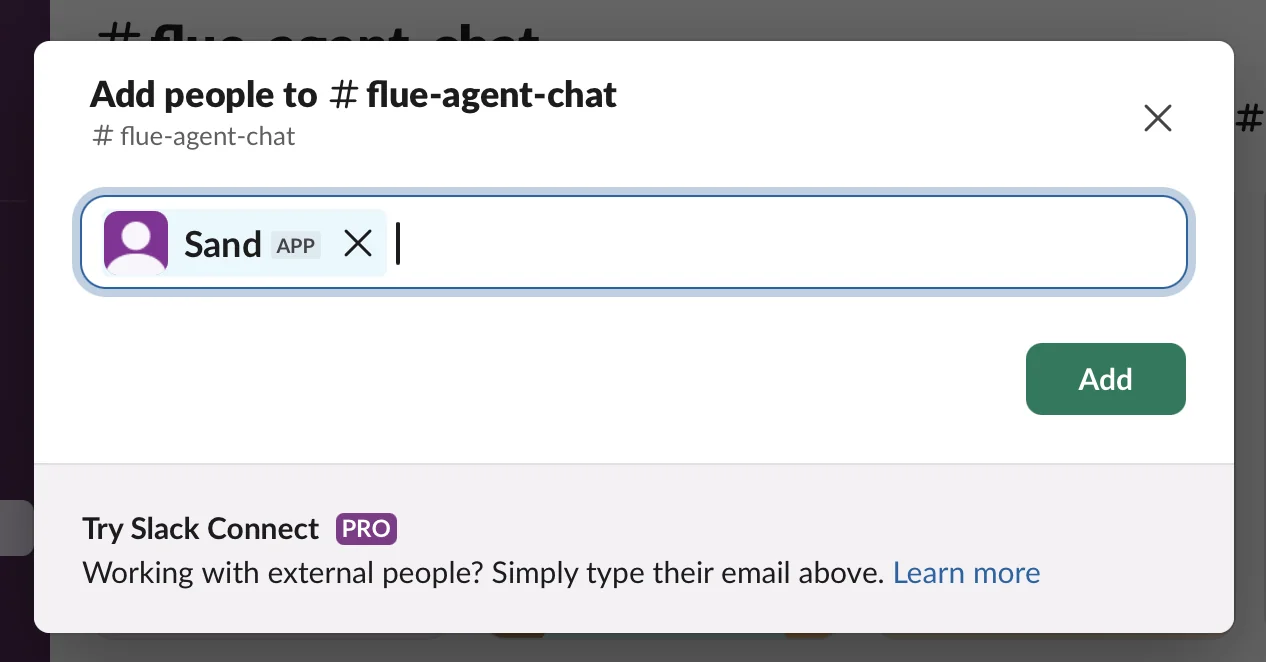
SLACK_BOT_TOKEN=xoxb-...SLACK_SIGNING_SECRET=...Finally we can invite our new app into a channel. A simple /invite @(appname) works great.
Creating the Flue Slack Agent#
To add Slack, we’ll open back up our coding agent and write the following prompt:
We want to add Slack to this Flue agent. Run "flue add channel slack". Weadded the app_mentions:read scope for receiving messages and chat:write forsending messagesAfter working for a while, you should get something like:
Added Slack channel support using npx flue add channel slack.
Changes:- Added Slack dependencies.- Added verified Events API ingress at /channels/slack/events.- Dispatches app_mention events to Assistant.- Added threaded Slack replies through chat.postMessage.- Kept the existing HTTP agent route working.- Mounted the Slack channel in src/app.ts.
Set these secrets:- SLACK_SIGNING_SECRET- SLACK_BOT_TOKEN
We should see a few new dependencies in package.json:
{ "name": "my-flue-worker", "dependencies": { "@flue/runtime": "^2.0.3", "@flue/slack": "^2.0.3", "@slack/web-api": "^8.0.0", "hono": "4.12.32", "valibot": "^1.4.2" },}@flue/slackSlack types and integration for Flue@slack/web-apiSlack’s Web API we use to easily interact with Slackvalibot- Type validation. Similar to Zod. Used for tools and initial data.
More importantly, our assistant.ts should be updated:
'use agent';import { useInitialData, useModel, useTool } from '@flue/runtime';import * as v from 'valibot';import { replyInThread } from '../channels/slack.ts';
const initialDataSchema = v.object({  channelId: v.string(),  threadTs: v.string(),});
export function Assistant() {  useModel('cloudflare/@cf/google/gemma-4-26b-a4b-it');  const data = useInitialData<v.InferOutput<typeof initialDataSchema>>();  useTool(replyInThread(data));  useTool({    name: 'generate_random_number',    description:      'Generate and return a random integer from 1 through 100. Use this when the user asks for a random number.',    run: () => ({ output: { value: Math.floor(Math.random() * 100) + 1 } }),  });
  return 'You are a helpful Slack assistant. Keep replies short. Always send answers with the reply_in_slack_thread tool. When asked for a random number, call the generate_random_number tool and include its result in that reply.';}
Assistant.initialData = initialDataSchema;
We can only start a new chat with our agent if we supply initialData. In this case it will be the channelId and threadTs. Every message in that thread tagging our agent will have that context. You can only provide this at the start and it cannot be changed (hence initialData).
Notice how our system message mentions calling the tool. Flue supplies the tool with its description using useTool, but it’s up to the LLM to call it. By specifying it explicitly in the instructions you reduce the chance of confusion.
There is also a new src/channels/slack.ts file. Most of it comes directly from the Flue Slack channel documentation and the Flue channels guide, so we’ll only look at the parts that are unique to this agent:
await dispatch(Assistant, { id: channel.instanceId(thread), idempotencyKey: payload.event_id, initialData: { channelId: thread.channelId, threadTs: thread.threadTs, }, message: { kind: 'signal', type: 'slack.app_mention', body: event.text, attributes: { eventId: payload.event_id }, },});The idempotencyKey prevents a message to be processed by Slack twice. We also pass the channel and thread as initial data so reply_in_slack_thread can reply to the correct thread.
// Slack's WebClient defaults to an unbound global fetch and redirect: 'error'.// Cloudflare requires the global receiver and supports only 'follow'/'manual'.// A manual redirect still reaches Slack's non-200 handling without following it.export const client = new WebClient(process.env.SLACK_BOT_TOKEN);export const client = new WebClient(process.env.SLACK_BOT_TOKEN, { fetch: (url, init) => globalThis.fetch(url, { ...init, redirect: init?.redirect === 'error' ? 'manual' : init?.redirect, }),});Deploying and Testing#
If you deploy now, you’ll get an error because we haven’t set our new secrets yet. We can do so with a single command:
$ npx wrangler secret bulk .env
 ⛅️ wrangler 4.123.0────────────────────🌀 Processing the secrets for the Worker "my-flue-worker"✨ Successfully created secret for key: SLACK_BOT_TOKEN✨ Successfully created secret for key: SLACK_SIGNING_SECRET
Finished processing secrets file:✨ 2 secrets successfully created
Now we can deploy:
$ npm run deployDeployed my-flue-worker triggers (0.58 sec) https://my-flue-worker.[your_workers_username].workers.devCurrent Version ID: 1ebf01e4-53e4-4dfe-a76e-712d778dfa30To test it, we need to subscribe to events in the Slack App page. We can do this now since we have deployed our Slack changes.
Go to the Event Subscriptions page and turn it on. Set the Request URL to https://my-flue-worker.[your_workers_username].workers.dev/channels/slack/events.
It should verify your URL and show you a verified indicator:
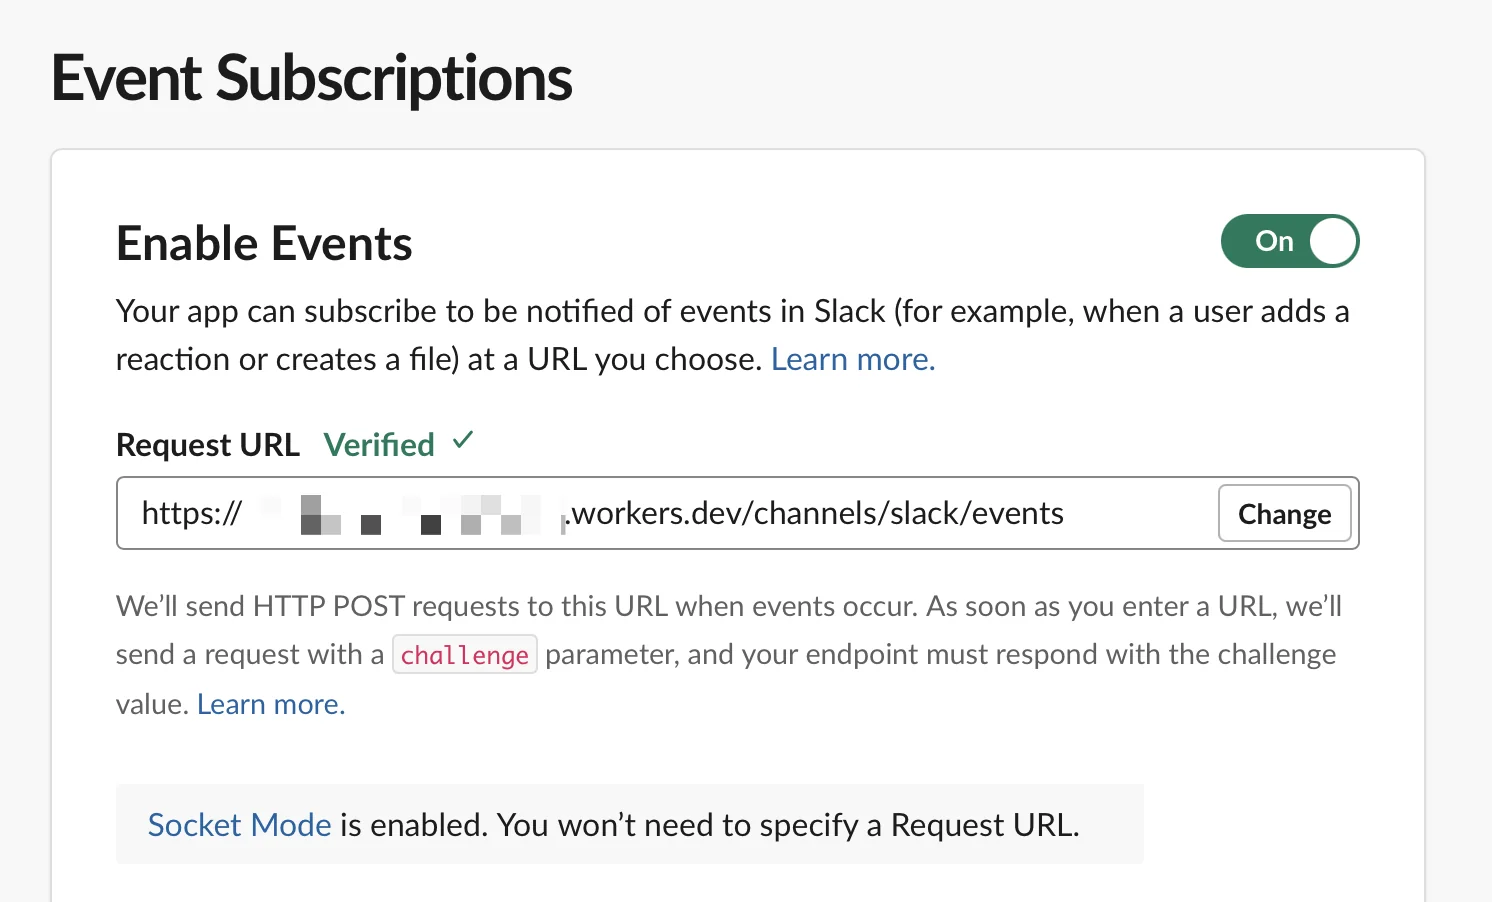
Then under Subscribe to bot events, add app_mention and press Save Changes. Now when someone mentions your bot, it receives an event that your agent will handle.
We’ll send our first message and see if it works…
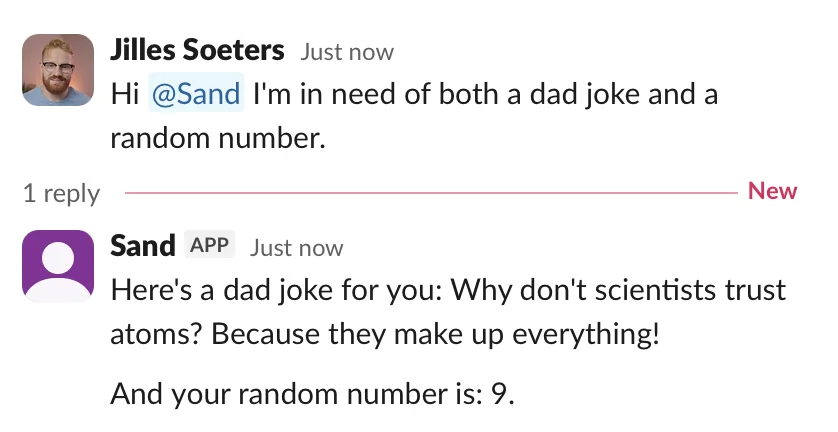
Checkpoint#
Holy shit. That was my first thought when I saw it work. So few lines of code and I can have an agent reply to my Slack messages?!
You could stop here, replace the generate_random_number tool with some useful tools and call it a success.
But to make this a more complete bot, we will:
- Set the ”👀” emoji when the agent receives the request and remove it before sending a reply.
- Add some chat state using
usePersistentState.
Adding a Working Indicator#
Creating my first Slack bot was a bit of trial and error. At first it didn’t work because I left Socket Mode on. So the webhook never arrived as a normal POST request.
I eventually found the issue in the logs, but I looked only after a few minutes. I thought: maybe the agent was thinking / working?
The eyes emoji reaction gives you immediate feedback that your agent at least received the request. So if the webhook doesn’t arrive, you know it immediately.
Another interesting part about agents is that we can send multiple messages and still get a single response.
This means we need to keep track of all messages while the agent starts, and then remove the eyes emoji once they’re done.
We’ll need to add the message’s timestamp to keep track of the user’s messages. Slack uses a combination of channel and timestamp to identify messages.
We also need a way to add and remove reactions, which is quite easy using the Slack Web API.
import { type ReactionsAddArguments, WebAPIPlatformError } from '@slack/web-api';
// inside the event handlerawait dispatch(Assistant, {  id: channel.instanceId(thread),  idempotencyKey: payload.event_id,  initialData: {/* ... */},  message: {    // ...    attributes: {      eventId: payload.event_id,      messageTs: event.ts,    },  },});
type SlackMessageRef = Pick<ReactionsAddArguments, 'channel' | 'timestamp'>;
export async function addEyesReaction(ref: SlackMessageRef) {  try {    await client.reactions.add({ ...ref, name: 'eyes' });  } catch (error) {    if (error instanceof WebAPIPlatformError && error.data.error === 'already_reacted') return;    throw error;  }}
export async function removeEyesReaction(ref: SlackMessageRef) {  try {    await client.reactions.remove({ ...ref, name: 'eyes' });  } catch (error) {    if (error instanceof WebAPIPlatformError && error.data.error === 'no_reaction') return;    throw error;  }}
Now we’ll have to handle this inside of our agent:
'use agent';import {  useAgentFinish,  useAgentStart,  useDelivery,  useInitialData,  useModel,  usePersistentState,  useTool,} from '@flue/runtime';import * as v from 'valibot';import { addEyesReaction, removeEyesReaction, replyInThread } from '../channels/slack.ts';
const initialDataSchema = v.object({  channelId: v.string(),  threadTs: v.string(),});
export function Assistant() {  useModel('cloudflare/@cf/google/gemma-4-26b-a4b-it');  const data = useInitialData<v.InferOutput<typeof initialDataSchema>>();  const delivery = useDelivery();  const messageTs = delivery.kind === 'signal' ? delivery.attributes?.messageTs : undefined;  const [pendingReactionTimestamps, setPendingReactionTimestamps] = usePersistentState<string[]>(    'pendingSlackReactionTimestamps',    [],  );
  useAgentStart(async () => {    if (!messageTs) return;    await addEyesReaction({ channel: data.channelId, timestamp: messageTs });    setPendingReactionTimestamps((timestamps) =>      timestamps.includes(messageTs) ? timestamps : [...timestamps, messageTs],    );  });
  useAgentFinish(async () => {    if (pendingReactionTimestamps.length === 0) return;    await Promise.all(      pendingReactionTimestamps.map((timestamp) =>        removeEyesReaction({ channel: data.channelId, timestamp }),      ),    );    setPendingReactionTimestamps([]);  });
  useTool(replyInThread(data));  useTool({    name: 'generate_random_number',    description:      'Generate and return a random integer from 1 through 100. Use this when the user asks for a random number.',    run: () => ({ output: { value: Math.floor(Math.random() * 100) + 1 } }),  });
  return 'You are a helpful Slack assistant. Keep replies short. Always send answers with the reply_in_slack_thread tool. When asked for a random number, call the generate_random_number tool and include its result in that reply.';}
Assistant.initialData = initialDataSchema;
Whoa, there is a lot here but let’s go through it.
useDelivery()gets the current message. It’s eitheruserorsignal. Here we get the message’s timestamp we added to the object earlier.usePersistentState()stores a list of message timestamps.useAgentStart()runs when the agent receives a message (could be multiple)useAgentFinish()runs when the agent stops / finishes
Deploy using npm run deploy and you should have a fully working Slack bot that acknowledges messages, reasons, replies, and removes the reaction!
Outro#
I had so much fun building this Slack bot with Flue. Hopefully you found this useful too, and perhaps caught the Flue bug (would that be called the flu?). Once you understand a few of the building blocks of Flue, you’ll be able to create agents at remarkable speed.
One thing we didn’t do here is create useful tools. Your tools could access any Cloudflare primtive. Want to take a screenshot of a page? Your tool can call browser run. Need to share store state across different agents? Use D1. Need to send out emails? Email Service. The options are almost endless, and I can’t wait to see what you build!
You can find the source code of the bot on GitHub.